Assign Loyalty Level Based on Order Value and Send Email
Objective
Assign a loyalty level (e.g. Platinum, Gold, Silver, Bronze) to your contacts based on the value of their first order, and send them a follow-up email.
Whiteboard
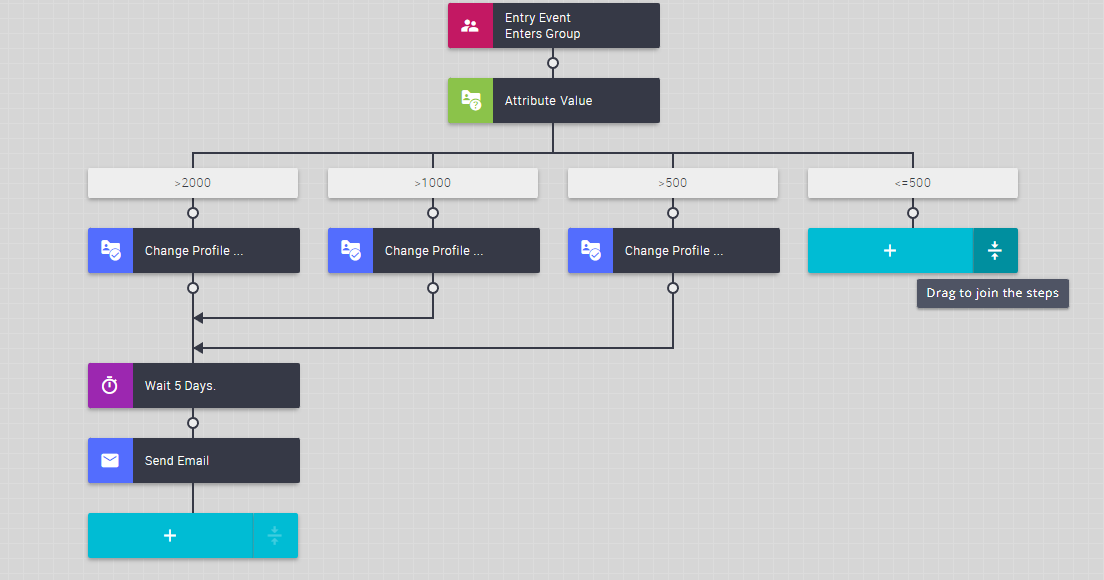
A customer makes their first purchase on your website and signs up to receive emails. They will be added to a group and sent on different journeys depending on the amount they spent on their first purchase.
- The automation will change the profile attribute of contacts who spent more than a certain amount on their first purchase to Loyalty Level Platinum, Gold, Silver, or Bronze.
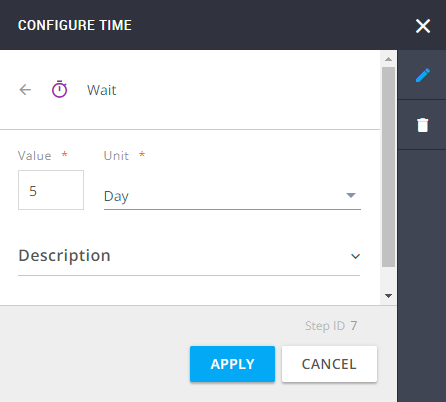
- The steps can be adjusted to the needs of your campaigns. In our example, we have added a waiting period of 5 days in which no action will be taken.
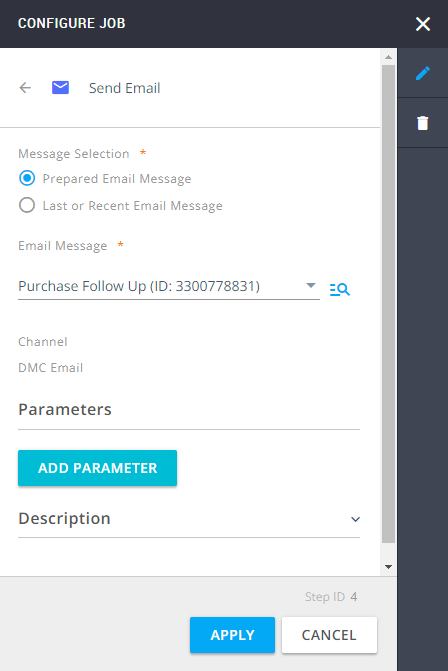
- After 5 days, all contacts on the Whiteboard will receive an email message. For example, information about their loyalty status and a thank you note, or a promotional email.
The video below demonstrates how to build a Whiteboard for this scenario.
For more information about the objects used in this configuration, see List of Objects used in Example Configurations.
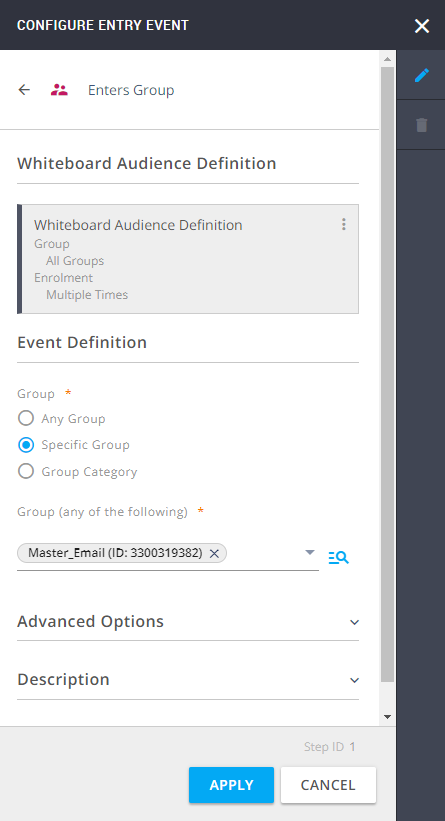
- Create an Event-Based Whiteboard with Enters Group as the entry event.
- Add the filter Attribute Value and create four paths within this filter. Rename the paths so that you can identify them easily. In this example, the paths are:
- > 2000 for contacts who spent more than 2000 on their first purchase,
- > 1000 for contacts who spent more than 1000 on their first purchase,
- > 500 for contacts who spent more than 500 on their first purchase,
- <= 500 for contacts who spent equal or less than 500 on their first purchase.
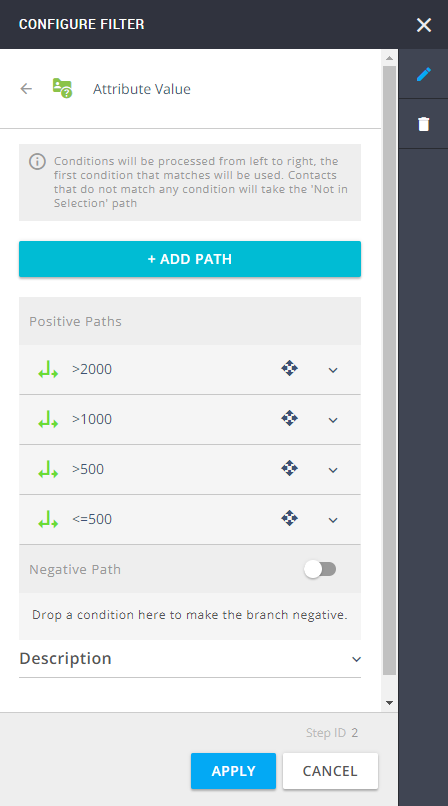
- Configure the paths:
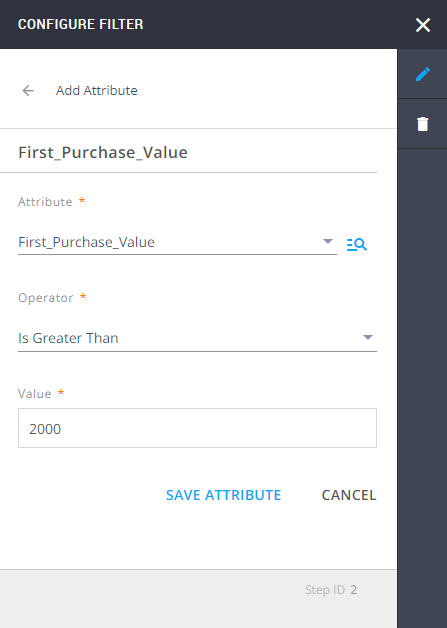
- > 2000:
- Attribute: First_Purchase_Value
- Operator: Is Greater Than
- Value: 2000
- Repeat this step for the remaining three paths, changing the Value accordingly:
- < 1000: set Value to Is Greater Than 1000
- > 500 set Value to 500 Is Greater Than 500
- <= 500 set Value to Is Less Than or Equals 500
- > 2000:
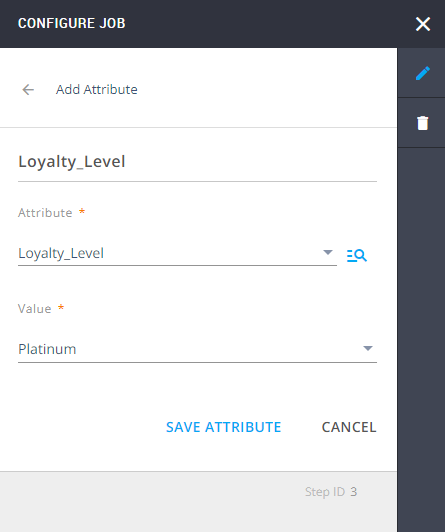
- Add job Change Profile Attribute to all four paths and configure:
- Attribute : Loyalty_Level,
- Value : Platinum, Gold, Silver and Bronze respectively
- Add a Wait step from the Time section to the > 2000 path, and set it to 5 days.
- Add job Send Email to the > 2000 path and select the prepared email message.
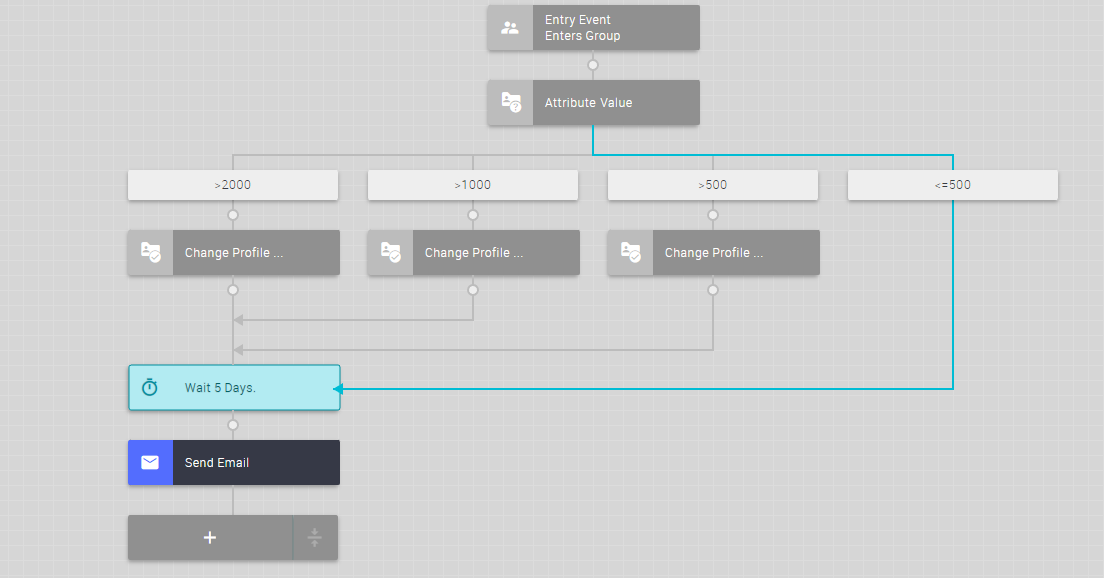
Merge the remaining paths with the Wait step by dragging and dropping.

The Wait and Send Email steps are the same for all paths, and it is not necessary to add them to each path individually. Instead, you can merge the paths and be more efficient.
You can continue with more steps, add a goal to the whiteboard, and set it up as you need. This is just one of many possible scenarios.