action
Any action on a website can be tracked as an event in Mapp Intelligence.
Events can be as simple as a click on a link or as advanced as tracking scroll behavior or content engagement.
Overview
| Value | Description | Data type | Default value | Required | Where to analyze | Request Parameter |
|---|---|---|---|---|---|---|
| name | Unique identifier of your event. Find more details below. | String | - | Yes | Navigation > Events | ct |
| parameter | Use event parameters to add additional information to an event. Find more details below. | Object | - | - | Navigation > Events > Event Parameters or metric | ck[ID] |
| goal | Use goals to track the success of your website and campaigns. Find more details below. | Object | - | - | Marketing > Website Goals | cb[ID] |
Further information
name
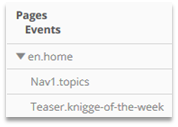
The name of the linking page does not have to be submitted in the event's name. This is because it is automatically assigned to the page that was tracked last.
Simply add the dimension "pages" to the analysis or use a filter.
parameter
Before use, parameters must be set up under Mapp Q3 > Configuration > Custom Parameters > Event Parameter. The ID and data type (text/number) are defined for each parameter during setup. Find more info here.
Example (parameter with ID "1"): {1:"position-1"}
goal
Website goals help to track the success of your website. You can quickly analyze and filter individual goals in Mapp Intelligence.
Furthermore, the calculation of the customer journey is based on website goals. This means you can track which campaigns are responsible for a goal's achievement. Find more info here.
The website goal "Order" is predefined in Mapp. A goal parameter has to be set on the corresponding pages if you have other website goals.
Typical examples are:
- newsletter registration
- signup
Configuration
- A parameter must be set up under Configuration > Custom Parameters > E-Commerce Parameter.
- The ID and data type (text/number) are defined during setup.
- Website goals have to be configured at Configuration > Goal.
- When configuring tracking in the pixel, you need to include the ID as a number and the respective value as a string.
Example (parameter with ID "1"): {1:"newsletter-registration"}
The goal is set as achieved as soon as a parameter is tracked (no matter what value is submitted!).
Implementation Example
If you do not have automatic page tracking enabled, invoke the track method after adding all relevant tracking information.
<template>
  <div>
    <button @click="onClick">ClickMe</button>
    <p>The button has been clicked {{ clicks }} times.</p>
  </div>
</template>

<script>
  export default {
    name: "example",
    data: () => {
      return {
        clicks: 0
      };
    },
    methods: {
      onClick() {
        this.clicks++;
        this.$webtrekk.action({
          name: "button clicked",
          parameter: { 1: this.clicks.toString() }
        });
        this.$webtrekk.trackAction();
      }
    }
  };
</script>