Using the HTTP Request Job in the Whiteboard
This article covers the steps to build a marketing automation using the HTTP Request job in the Whiteboard.
The procedure is very similar to creating any other Whiteboard. The Job-specific settings that you define include: request parameters, and parser specifics to handle the HTTP Response.
Define the HTTP Request
Create a new Whiteboard.

HTTP Request is available with every type of Whiteboard: event-based, scheduled and recurring.
HTTP Response is available as follows:- Event-based: available
- Scheduled: available with event zone
- Recurring: not available - limited to HTTP Requests only
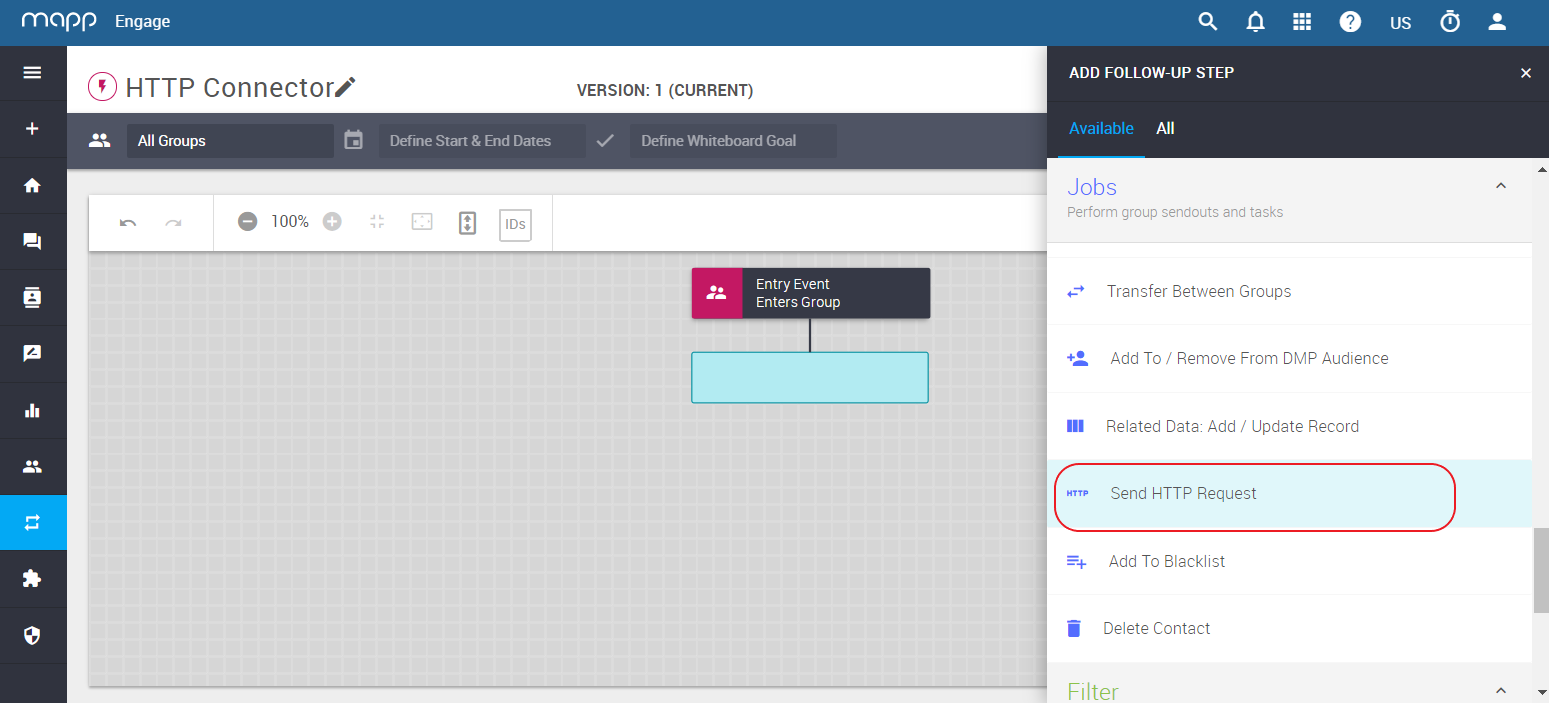
Select the entry Event (for example, Enters Group) and add the job Send HTTP Request.
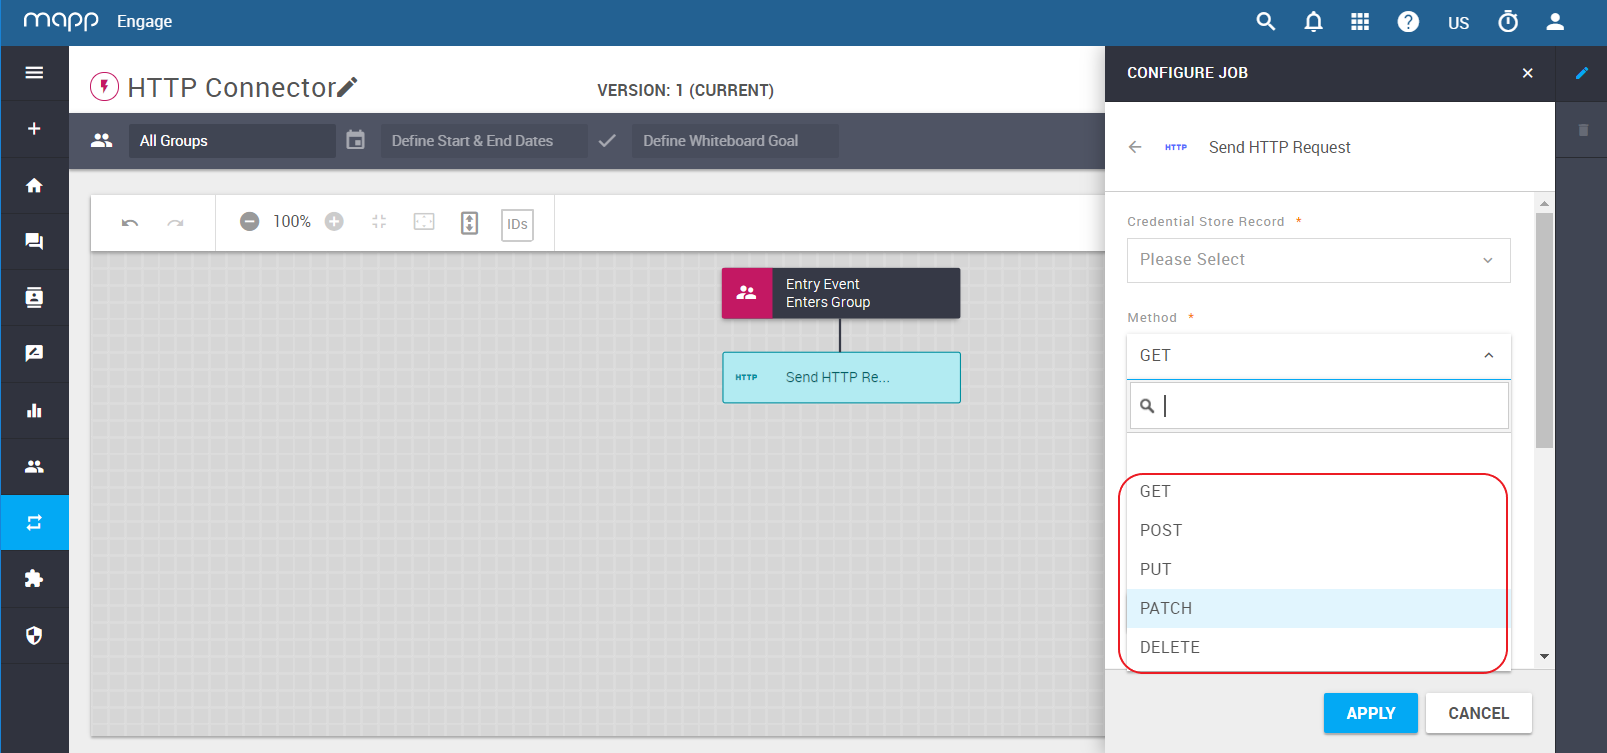
- Define the method: Get, Post, Put, Patch and Delete.
- Optionally, check the box Continue the whiteboard flow if the request fails.
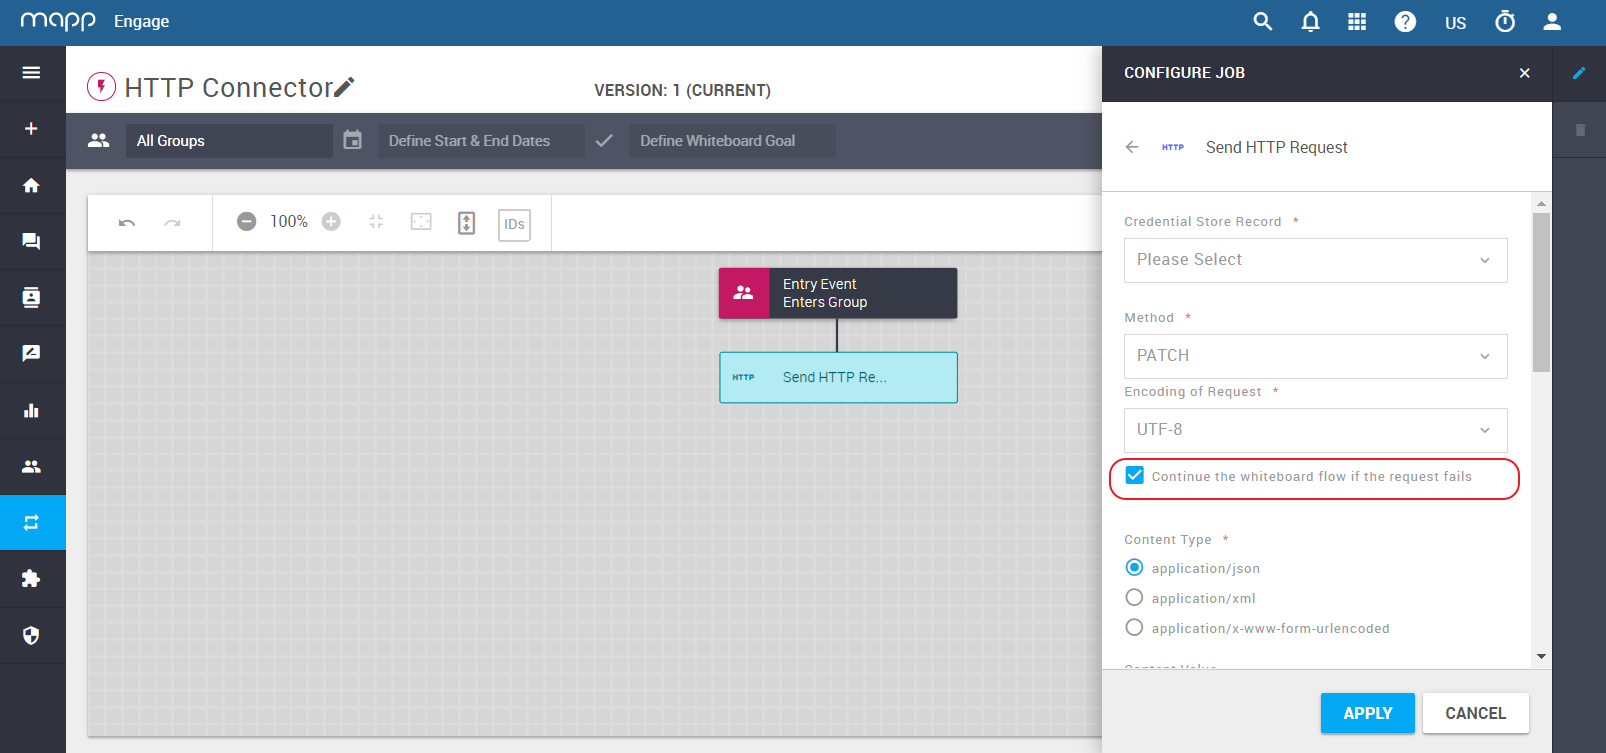
- Select the Content Type for your request. Available Content Types are: application/json, application/xml and application/x-www-form-urlencoded.
It will be used as your request header. You can add additional headers using the button Add Header.
Click Add Parameter. Give the parameter a name and configure its value.
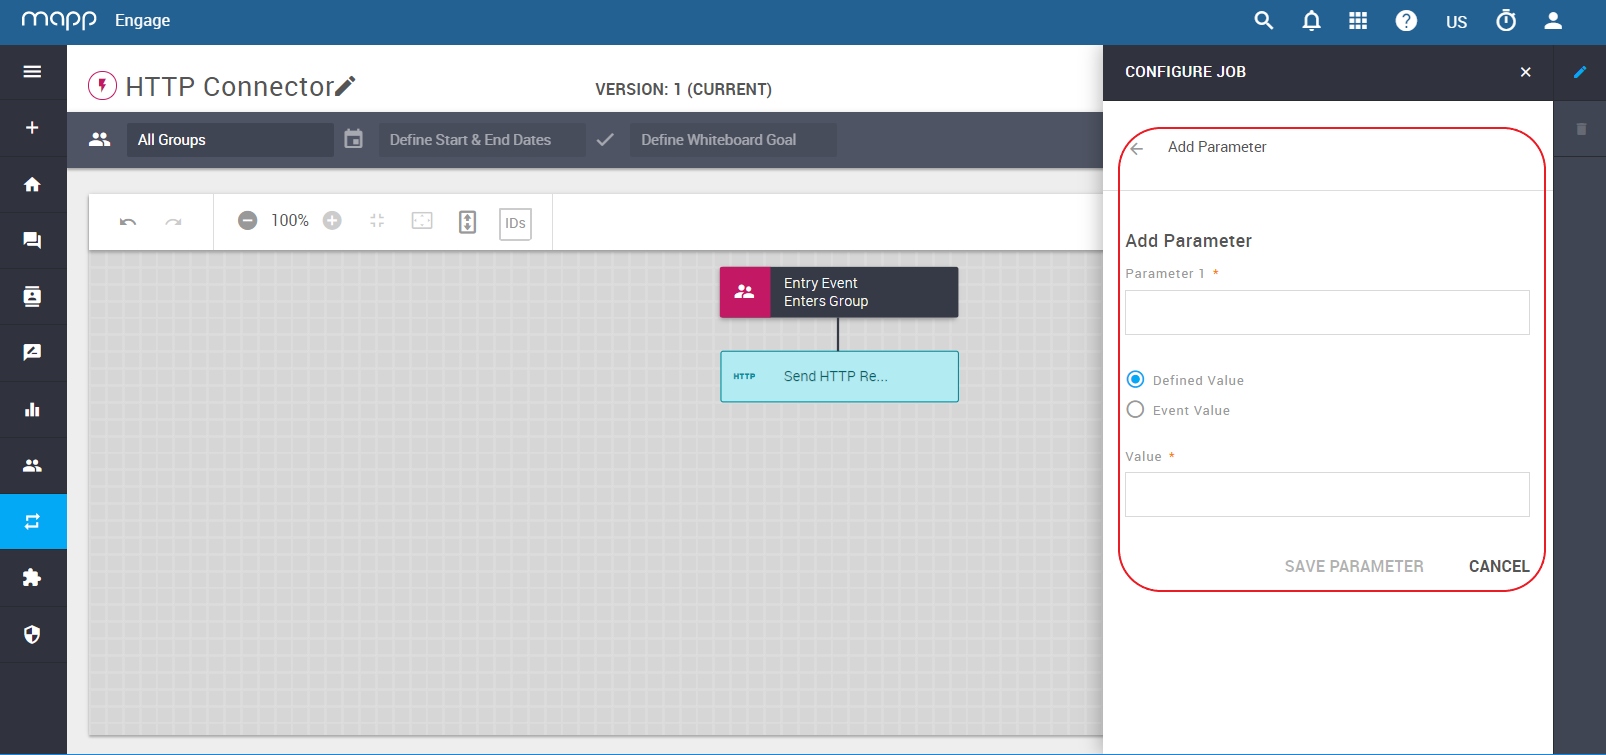

You can add up to 10 parameters in your automation.
Configure the response body parser. This allows you to use the parameter values received from the server.
In section HTTP Response Body Parser, select the parser type and click Add Parser.
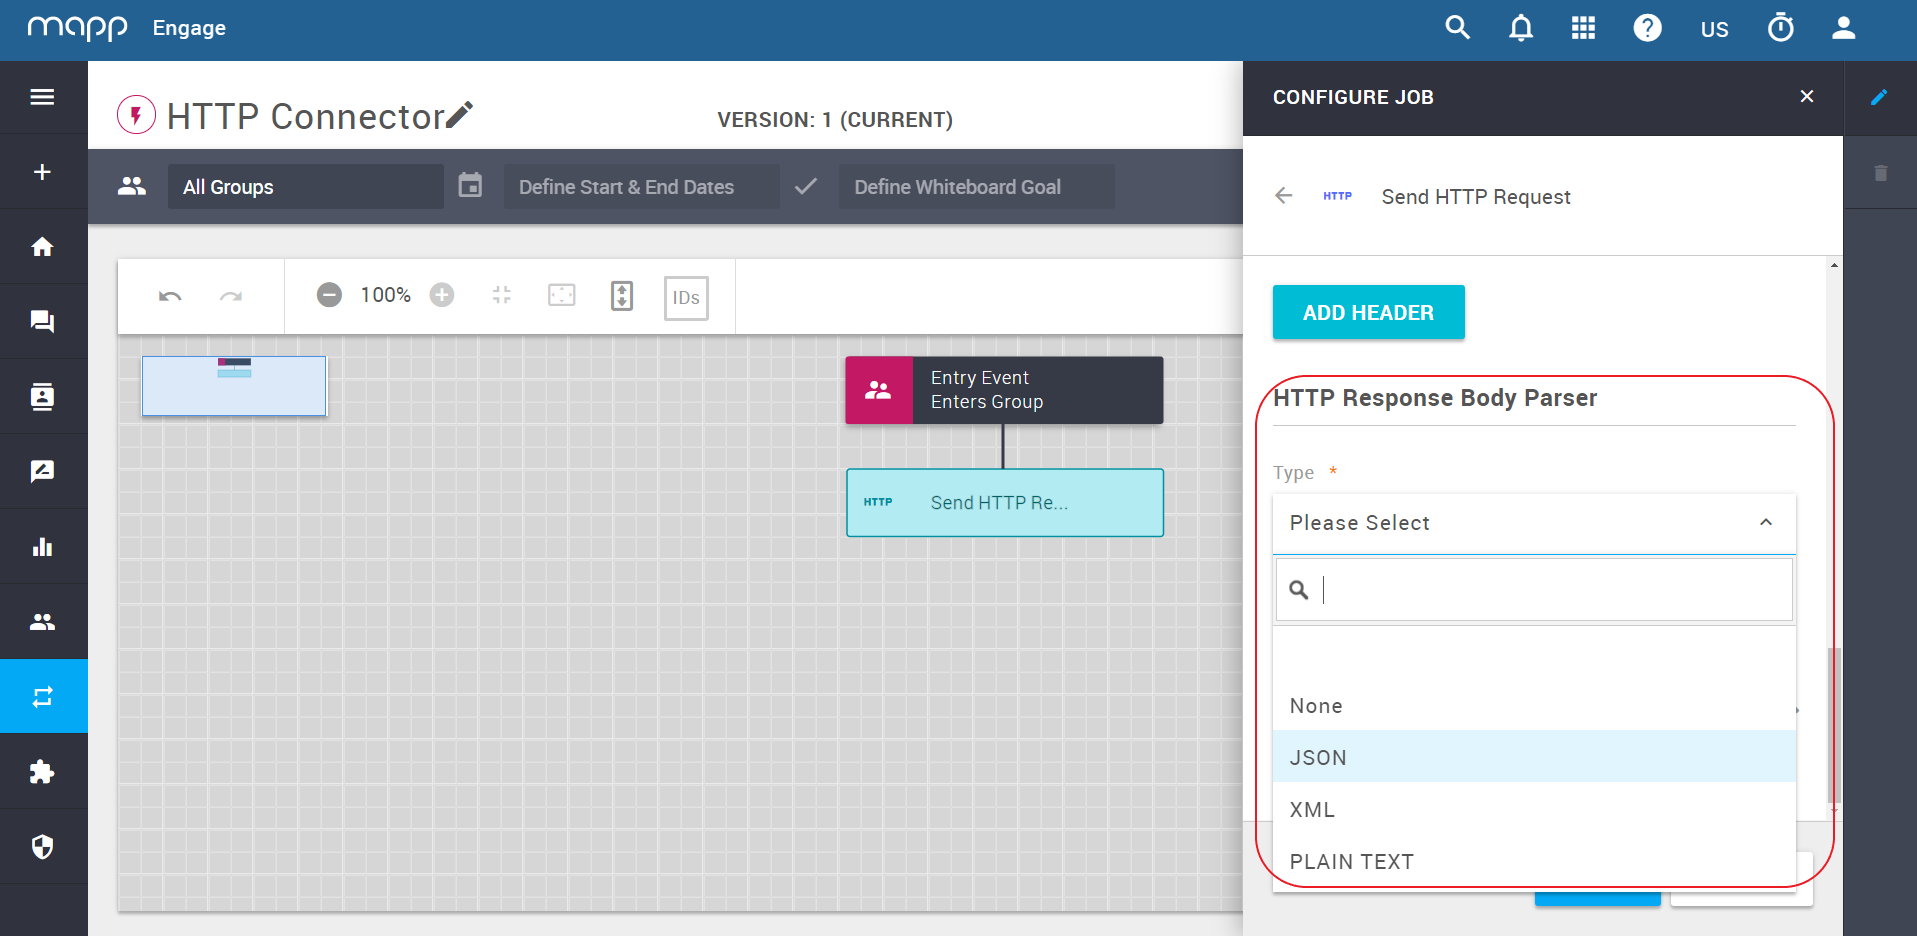
The Body Parser covers industry standard formats XML and JSON. Using a custom regex-like parser is also possible.Parser Type Details XML You can find more information on the web, for example here. JSON You can find more information on the web, for example here. Plain text This option is for your custom parser, using Mapp Engage Functions. None Select this option if you are not interested in any parameters.
It is possible to use previously parsed HTTP parameters in the body of the next HTTP Request.
To do this, use one of these formulas inside the request body:
<%${parameter.XXX}%>or
<%${parameter['XXX']}%>XXX is the name of the parameter parsed in the previous Send HTTP Request job.
The HTTP Request must directly follow the request where the parameters were parsed.
Enter the parsing formula, parameter name and type. Click Save Parser.

Add more parsers if needed.
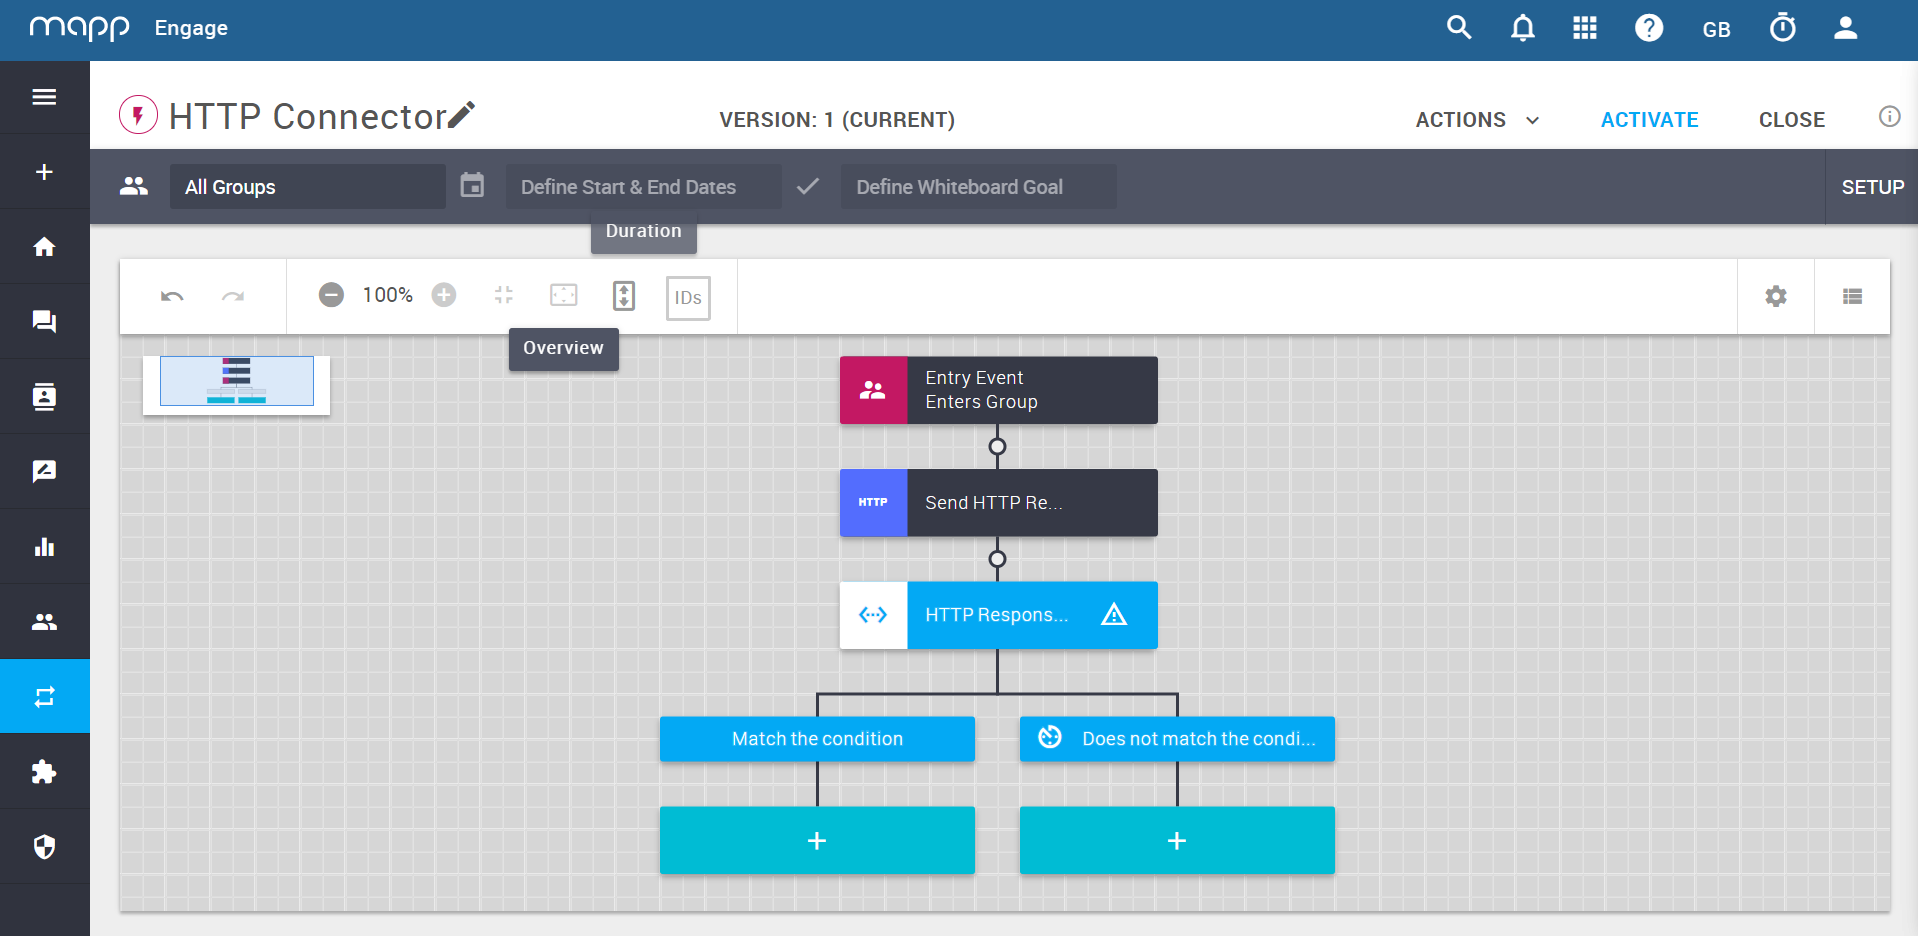
Configure response criteria matching
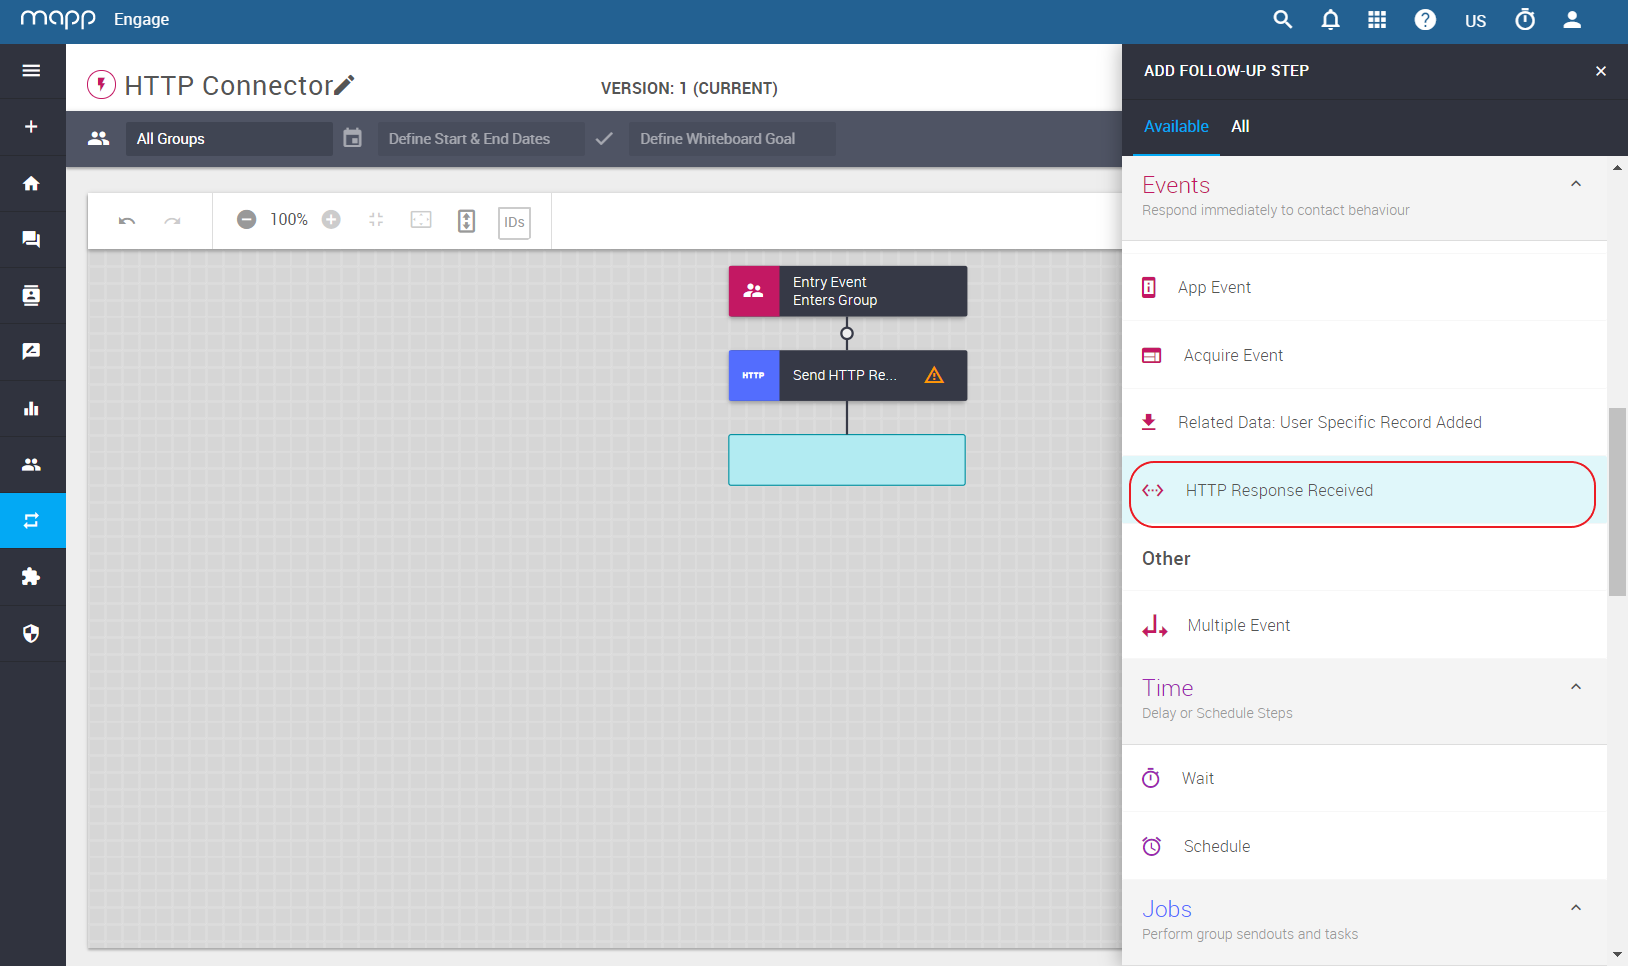
You have set up everything for your HTTP request. The event HTTP Response Received is now available. You can define criteria matching based on the HTTP response codes (value or range) and/or the parameters.
8. Add the event HTTP Response Received to your automation workflow.
9. Define criteria matching based on either the HTTP response codes, or the parameters, or on both.
a. based on the HTTP response codes:
b. based on your parameters:
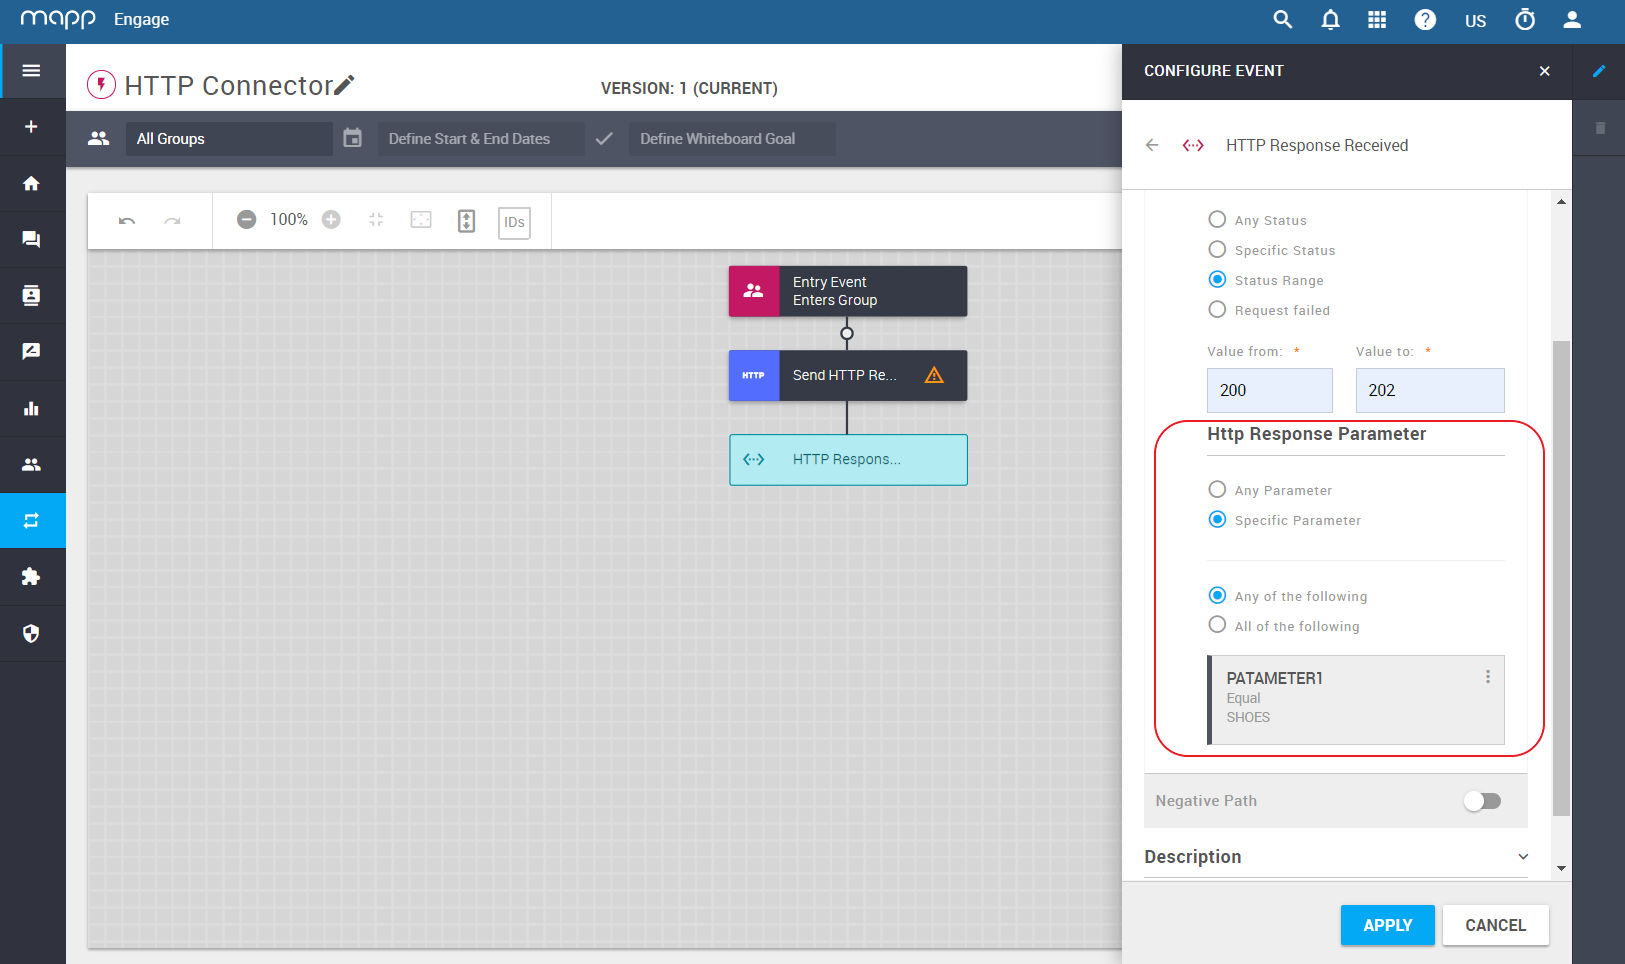
c. Optionally, add Negative Path and configure it too.
Click Apply.
Use HTTP Response values
The parsed HTTP Response values are available as event values for the next Whiteboard job. For more details on building Whiteboard automations, see Whiteboard Online Help.