Step 2: Configuring and Activating the Plugin
In this section, you will find the steps to integrate the plugin based on the used pixel integration.
The Page Load Time plugin lets you track the loading time of a single page and integrate the reported values into Mapp Intelligence. Learn more about it here.
Where does the information come from?
The browser automatically informs the plugin when the 'onload' event is fired. It waits until the page is completely loaded (browser event 'onload' or browser property 'document.readyState === complete').
Once the parameters have been activated, these must be configured for tracking. This is done via the Mapp Q3 tool under Configuration > Custom Parameters > Event Parameters. Create a new parameter here and select one of the predefined configurations for measuring loading times.
A predefined ID is assigned to each parameter:
- Event parameter 920: loading time in milliseconds
Methods and properties
name
Get the name of the extension.
/**
 * @type {string}
 */
wtSmart.extension.page_load_time.name;version
Get the version of the extension.
/**
 * @type {string}
 */
wtSmart.extension.page_load_time.version;isActivated
Get the status, if the extension is enabled.
/**
 * @returns {boolean}
 */
wtSmart.extension.page_load_time.isActivated();activate
Activate the extension.
wtSmart.extension.page_load_time.activate();deactivate
Deactivate the extension.
wtSmart.extension.page_load_time.deactivate();Example
// is page load time activated
var isActivated = wtSmart.extension.page_load_time.isActivated();

// activate page load time
wtSmart.extension.page_load_time.activate();

// deactivate page load time
wtSmart.extension.page_load_time.deactivate();
Integrate the Page Load Time plugin into the container in which the webpage to be measured is located.
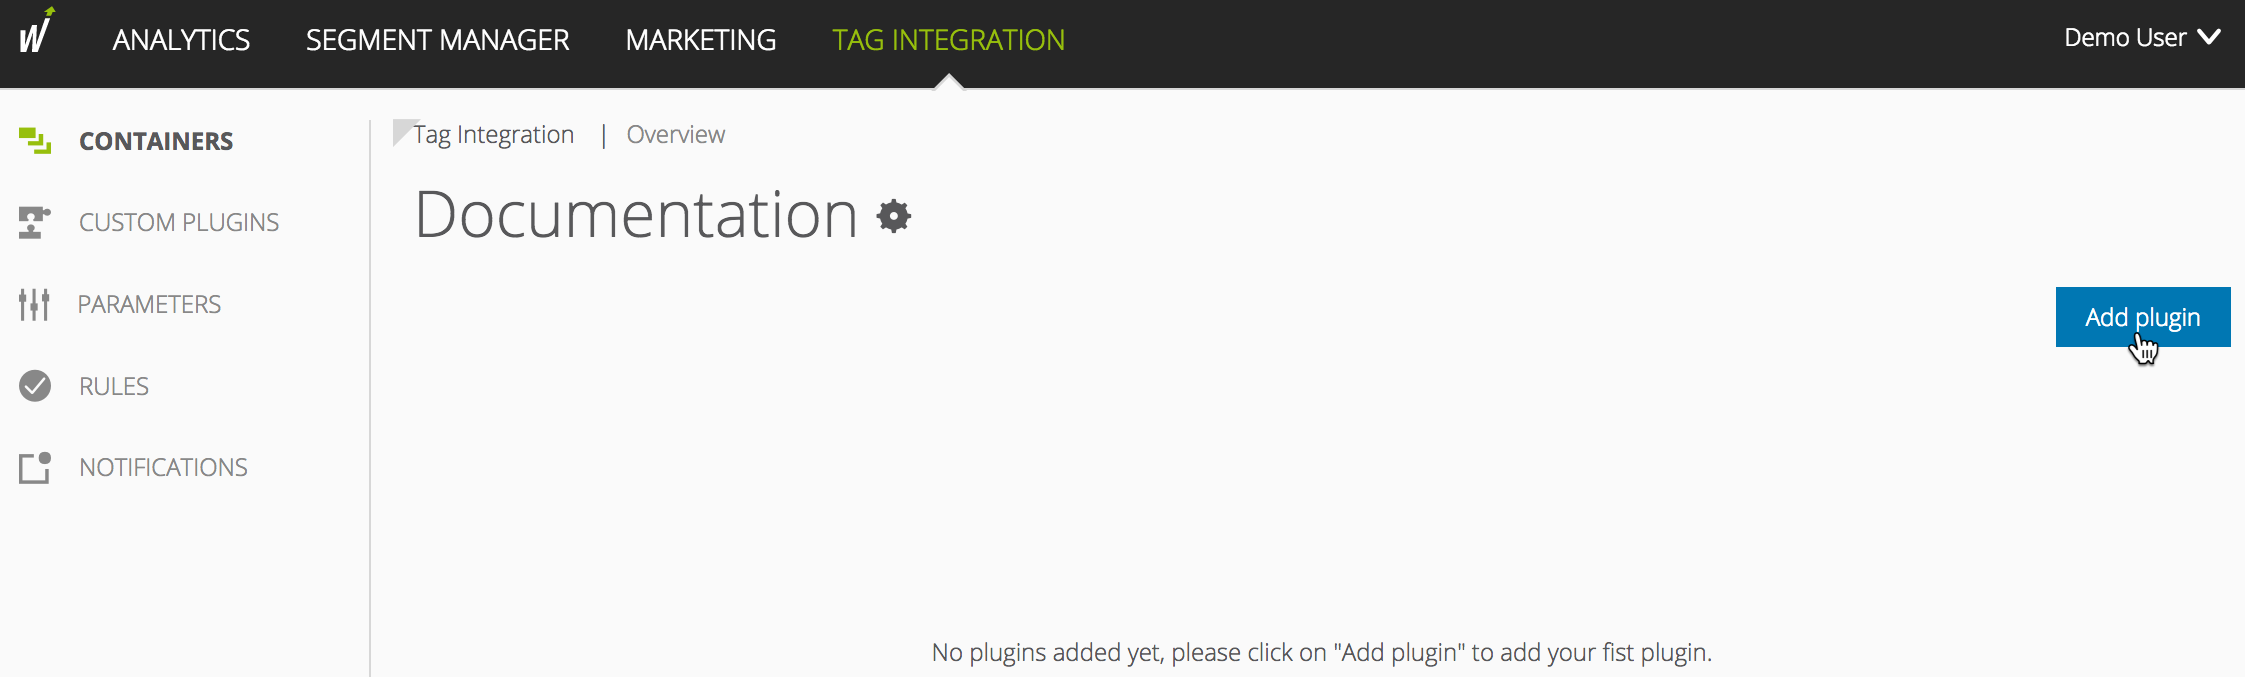
To add plugins to the desired container, proceed as follows:
- In the container overview, select the required container by clicking the corresponding entry.
- Click Add Plugin. You will be forwarded to the overview of all available plugins.
Select Page Load Time plugin by clicking the appropriate button. The plugin configuration dialog opens.
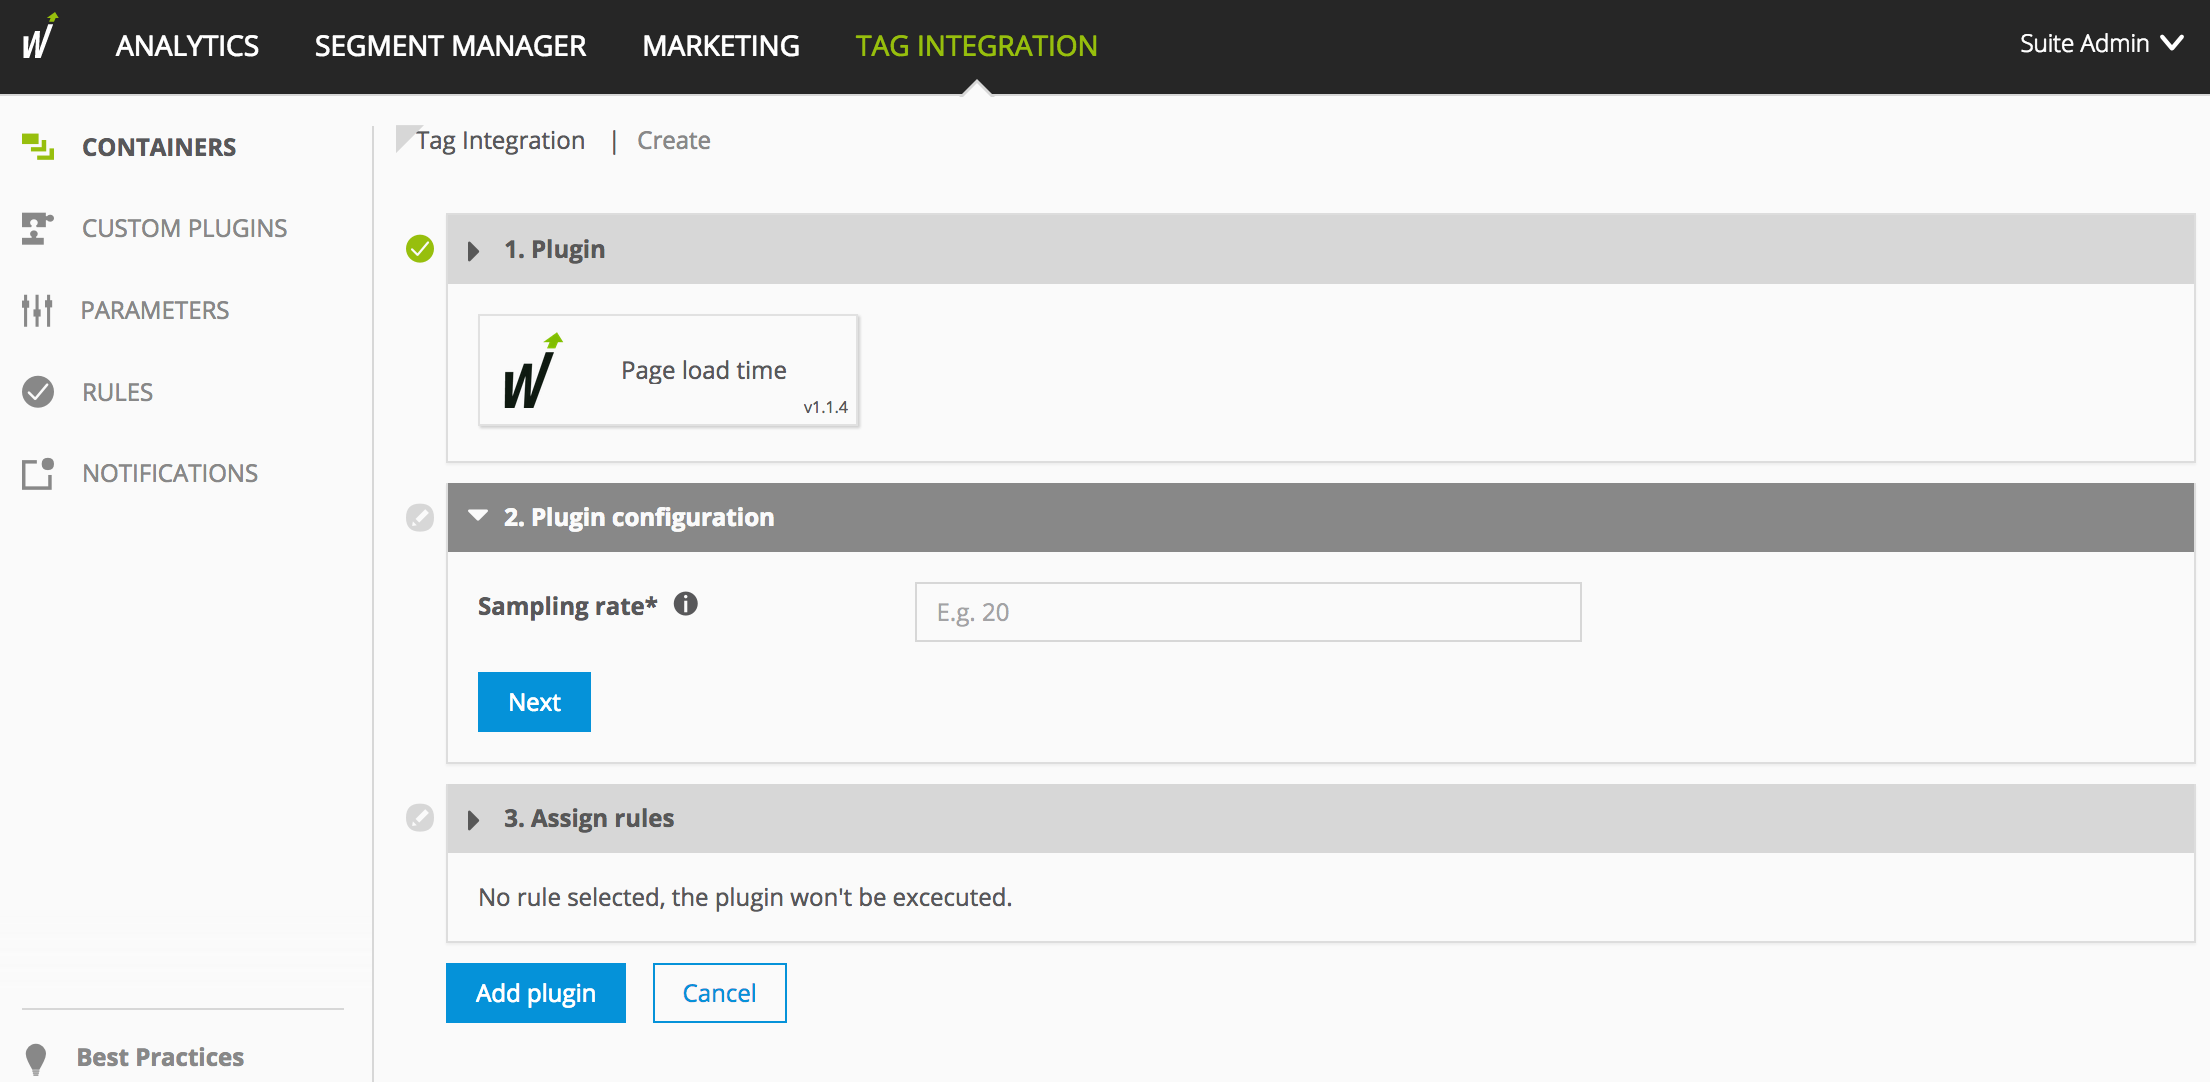
Now enter the following information:
Sampling rate By integrating the plugin, every 50th-page call on your site is measured by default. Average values are calculated from these measured values.
If you want a different sampling rate, you can adjust it here.
Specify how often the page request is to be supplemented by the loading time.
Examples- Value = 0: The loading time is measured at each page request.
- Value = 10: Only every 10th-page request contains the loading time.
Then click Next.
- In the Assign rules area, you define the page areas on which the measurement is to be carried out.
- Click Add plugin.
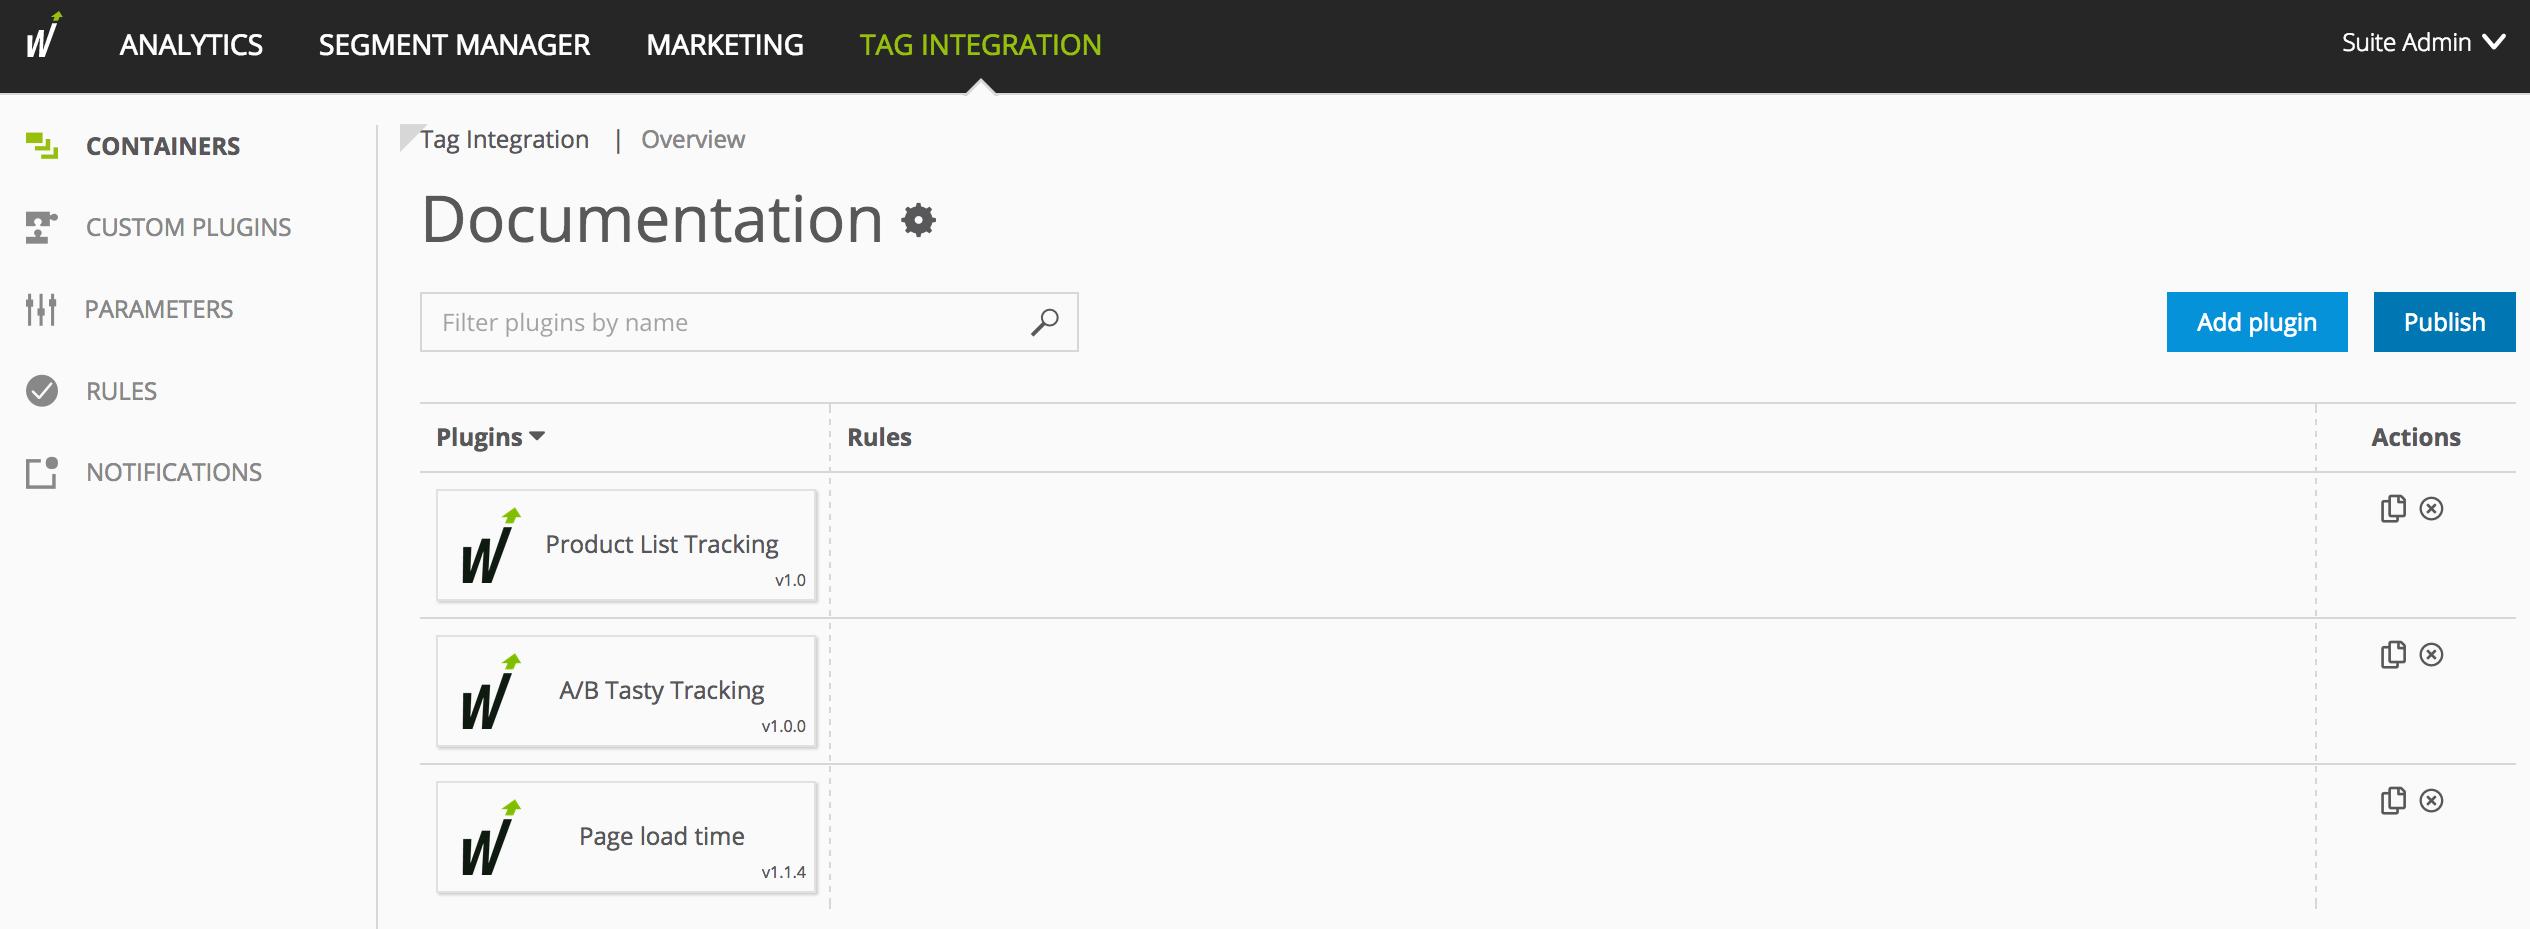
Finally, click Publish to publish your container including the newly added Page Load Time plugin.
- Download the JavaScript file.
In the JavaScript file pixel-PageLoadTime.min.js, make the following adjustments:
Examplewindow.wt_pageLoadTime = function (conf) { if (conf.mode === "page" && conf.type === "before" && conf.requestCounter === 1) { var pageLoadTimeConf = { samplingRate: "50" }; // ... } };JSParameter Description Sampling rate By integrating the plugin, every 50th-page call on your site is measured by default. Average values are calculated from these measured values.
If you want a different sampling rate, you can adjust it here.
Specify how often the page request is to be supplemented by the loading time.
Examples- Value = 0: The loading time is measured at each page request.
- Value = 10: Only every 10th-page request contains the loading time.
Include the script file in your website in advance so that it provides the method wt_pageloadtime under the object "window"
The parameter executePluginFunction is used for the activation itself. This can be set either in the configuration variable (webtrekkConfig) in the global pixel file (for example, "webtrekk_v3.js") or as a parameter of a page-specific pixel object.
The data acquisition is started as soon as the plugin is activated.
Example global configurationvar webtrekkConfig = { trackId: "111111111111111", trackDomain: "track.webtrekk.net", domain: "www.website.com", executePluginFunction: "wt_pageLoadTime" };JSExample page-specific configuration
var wt = new webtrekkV3();
wt.contentId = "en.home";
wt.executePluginFunction = "wt_pageLoadTime";
wt.sendinfo();
JS
If you want to measure the data on all your pages, we recommend global integration. The page-specific configuration is used for the measurement of individual pages.