Send an anniversary email to your contacts. You can send the email each year on the date when the contact subscribed to the group. Or, send the email a year after a contact first makes a purchase.
Benefits
Express your appreciation for your contacts' loyalty to your brand.
Celebrate milestones in your customer relationship.
Use the opportunity for cross-selling or sending a special offer.
Procedure
This procedure has three parts.
A) Create the prepared message.
B) Create a selection that identifies recipients whose member creation date matches the current date (ignoring the year).
C) Create time-based automation for daily sendout.
A) Create the Message
AnniversaryMessage
Save the message in the system as a prepared message.
In the Recipients > Selection area, create a new selection.
AnniversarySelection
Basis for Condition: Group
Group: (name of the group)
Click Add
Rule: Member Creation Date
Time range: Selection Run Date (without year), exactly before, 0 Days.
Add additional group conditions to this selection to send the anniversary message to more than one group. In the Grouping and Conjunction area, combine the group conditions with the conjunction or.
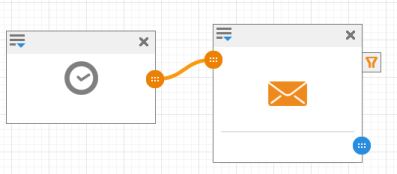
C) Automate Sendout on a Whiteboard
In the Automation area, create a new whiteboard.
Drag 1 Time module and 1 Time-based job module onto the whiteboard.
Drag and drop between the symbols to connect the modules.
Define the module settings as follows:
Time Module
Field
Setting
Date
Recurring Date
Time
Define the desired time of the daily sendout. The slider Hour works on a 24 hour clock.
Click Next. ⇒ The Whiteboard wizard opens to step two.
Define the desired time frame and notifications.
Click Activate to immediately activate the whiteboard. Only active whiteboards are executed by the system. ⇒ The whiteboard is saved and activated. The automation has the status Running if the start date is immediate and Scheduled if the start date is in the future.
Gain insight into the performance of your messages in the Statistics area. All of the messages are evaluated together as a single message. This allows you to see at a glance how your anniversary messages are performing. See Message Statistics (window).
Cookie Notice
We use technically neccessary cookies. For details, please have a look at: mapp.com/privacy