How to track forms in Single Page Applications
Automatic form tracking can easily be used with single page applications (SPA) based on frameworks such as Angular, React or VueJS. Since there is no page reloading in SPAs, but forms are sent using AJAX requests, you have to configure the sending of the form track requests manually.
Three steps are necessary to implement automatic form tracking:
- Preparation: Select the attribute of input elements with unique values.
- Initializing the Form: Mark the form and pass it to the pixel.
- Sending the Form Request: Send the form to the Mapp server either as "completed" or "canceled."
Preparation
Basically, you need a unique attribute for each form element. By default, it is the name attribute. But with the wt.formFieldAttribute you can customize it as needed.
Recommendation
Choose an attribute that has a unique value in each input element. Elements with multiple values or elements without this attribute are ignored during form tracking (which may also be desired).Using the Tag Integration interface, you can define the "Alternative form data attribute" for this purpose.
![]()
var webtrekkConfig {
trackId: "111111111111111",
trackDomain: "track.wt-eu02.net",
domain: "www.website.com",
form: "1",
contentId: "",
formPathAnalysis: true
};

var wt = new webtrekkV3(webtrekk);
wt.formfieldAttribute = "rel";var pageConfig {
var wt = new webtrekkV3(webtrekk);
wt.formfieldAttribute = "rel";Initializing the Form
Now you have to tell the pixel which element on your page is the form you want to track - usually, it will be a form element which you can either address generally with document.forms[#], or of course with document.getElementById ("id") if the form element has an ID attribute. These are the options to send this information to the pixel:
- Create a parameter that marks the form.
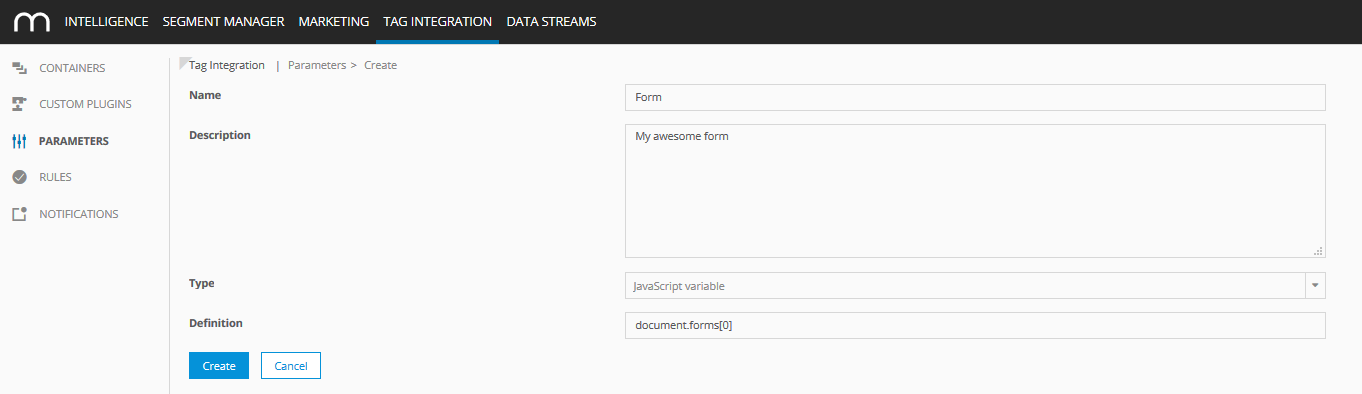
- Create a rule that determines on which page the form can be found.
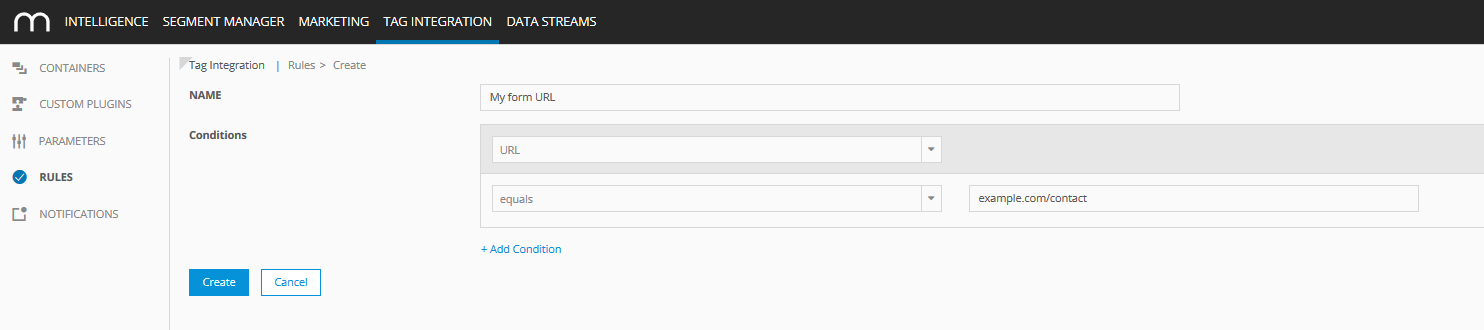
- Open your container and click the "Mapp Intelligence plugin" to open it.
- Under the "Form" tab, you can add new form tracking by specifying the form parameter as well as a rule.
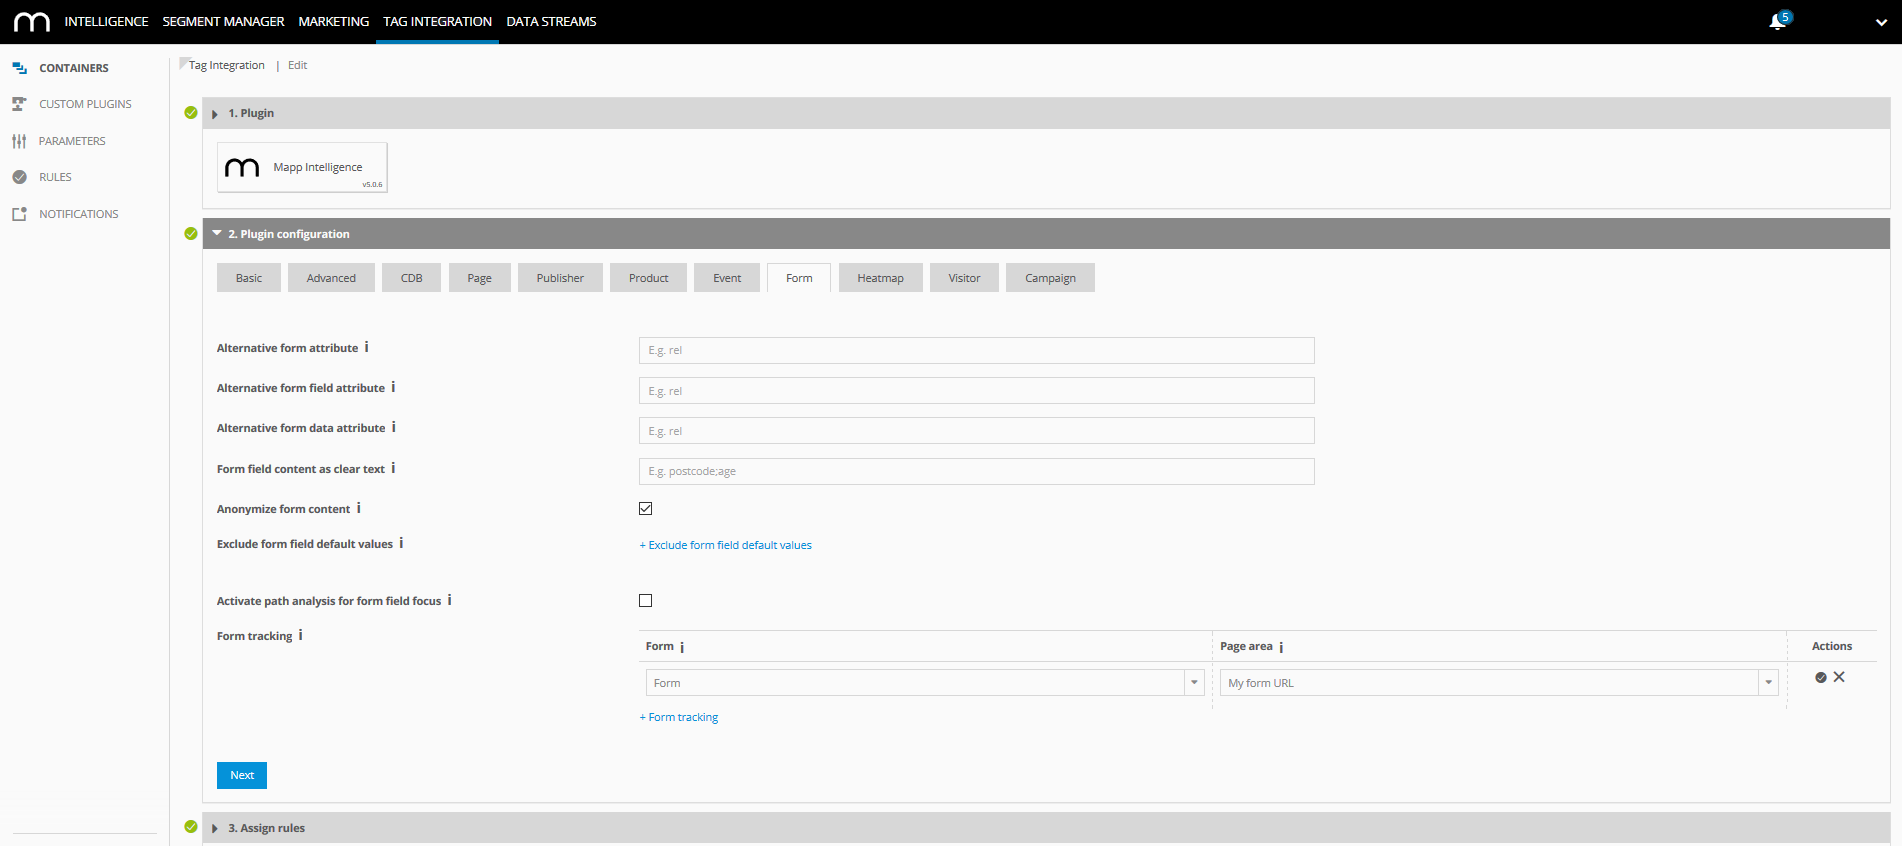
- Save your changes and republish the container so that the changes take effect.
Especially in SPAs, it can be easier to mark a form directly in the code. If you use Tag Integration, you can use the wts.push method. Passing the first form on a page would look like this:
// form tracking
wts.push(['formTrackInstall', document.forms[0]]);Example
wt.formTrackInstall(document.forms[0])Sending the Form Request
In Tag Integration, you can send a form using the following wts.push-methods:
Example
wts.push(["send", "form"]);
wts.push(['formTrackSubmit']);| Parameter | Description |
|---|---|
| wts.push(["send","form"]) | Method to send the form request from the pixel instance. This sends a form as "canceled". |
| wts.push(['formTrackSubmit']); | Method to track the form as "completed". |
The form is then considered as submitted. The "submitted" status does not influence how the individual elements are transmitted.
Example
wt.sendFormRequest(document.forms[0]);
wt.formSubmit = true;| Parameter | Description |
|---|---|
| sendFormRequest | Method to send the form request from the pixel instance. This sends a form as "cancelled". |
| formSubmit | true = The form is tracked as "completed". |
Installation in the Single Page Application
If you have a component with a form, you would include the send form in the Destroy-hook of the component, and append the formTrackSubmit to the method that sends the form data.
Related Topics
Technical Documentation: Forms
Single Page Solutions
Implementation Guidelines for Single Page Applications with Pixel v4