Export Data to Server (S)
This job exports data from the system. In contrast to the job Generate Report for Download, the exports are not defined in advance. This job offers a number of configurable exports.
Most of the export data is raw data pertaining to the addresses in the system. All address-related exports include the same standard information and, depending on the type of export, additional information. In addition to address-related exports, you can also export group attributes, blacklist information and accumulated domain statistics.
Depending on the export, the job may create more than one export file per job. The data are then exported individually for each group or for individual messages.
Hint:
It is possible to use the job Export Message Statistics to export message statistics. The statistics contain the data visible in the Statistics area of Engage. The export is in Excel or CSV format. The export generated as an Excel file processes the data visually and separates the data on different worksheets based on the information content. Charts and tables are also included in the export.
Hint:
In Engage, the designation (S) means system-related. Generally, you only combine system (S) events with system (S) jobs. For more information, see Contact (C) vs. System (S) Automations
Recommended Automations
An automation is a combination of an event plus a resulting job. The following combinations are recommended. It is possible to create other combinations, as well, but not all combinations of events and jobs result in meaningful system behavior.
Group Sendout Finished (S) + Export Data to Server (S): This automation exports data to a server whenever sendout in a group is finished. The export includes open and click data as well as address-related data, depending on the export type.
Contact Import Finished (S) + Export Data to Server (S): This automation exports data to a server whenever address import in a group is finished. This exports all address-related data, including newly imported and updated information.
General
Name | Displays the name of the automation that is defined in the Edit Event window. |
Description | Displays the description of the automation that is defined in the Edit Event window. |
Event | Displays the event that is defined in the Edit Event window. Every time this event occurs, Engage executes the dependent job. |
Job | Defines the job. Engage executes this job automatically every time the event occurs. For a list of all available jobs, see All Available Event-Based Jobs. |
Export Data
Group-based Exports
It is necessary to select one or more groups. One export file is generated per group.
For information about the specific exported data see Exported Information: Export Data.
Active Members: This item exports information about all addresses in the selected group and time frame that have Active membership status. A message is prepared for every active recipient during the message sendout. The active recipient can in principle be contacted. However, in some cases an active address will not receive a message. Addresses that are deactivated or on a Robinson list are sorted out during the sendout process. To export active members, a group must be specified.
Active Members (without Responses): This item exports information about all addresses in the selected group and time frame that have Active membership status. Active members who have generated a response are skipped during the export process. This function is currently under revision. Review the data in the export file before use.
Pending Members: This item exports information about all addresses with the membership status pending in the selected group and time frame. Members have this status when new members are added to a moderated group. The new members are pending until the moderator approves their membership. Group moderation is managed in the group settings.
Deactivated in Group: This item exports a list of all address in the group that are deactivated. A deactivated recipient is a recipient who no longer receives messages. A group member is automatically deactivated in the Engage system after a certain number of responses have been generated by the email address. It is not possible to manually deactivate a group member. The number of responses required before a recipient is deactivated can be manually defined in the group settings.
All Members: This item exports all of the members of a group. This includes recipients who have not received a message (for example, recipients with unconfirmed or deactivated status ).
Unconfirmed Members: This item exports the addresses of all recipients who have the status Unconfirmed. This status results when members subscribe to a group via a double-opt-in process. The recipient must confirm the subscription before he is activated and receives messages.
Members - Manual Subscription: This item exports all of the recipients who subscribed to the group by clicking the subscribe button in an email. Subscriptions on landing pages (API) are only taken into consideration if the executor is the logged-in address or if the parameter self is set. Unsubscribes produced by automated jobs are not considered.
Subscriptions (All): This item exports all of the recipients that have subscribed to a group. Exported addresses can have any status, whether active or any other status (deactivated, unconfirmed, etc.).
Unsubscribes (All): This item exports all addresses that have unsubscribed from a group.
All 2 (obsolete): This item exports all recipient data. However, this setting has been deprecated and is replaced by Active Members (without Responses). All 2 remains in the list because the setting is still in use on some existing systems. Do not use All 2 to set up new jobs! The feature is no longer updated and does not benefit from any system improvements.
Other Address-based Exports
These exports do not share the same basic data with the exports listed above.
System-wide Blacklist Entries: This item exports a list of all the entries on the system-wide blacklist. The export includes the addresses and any rules that were applied to filter the addresses (e.g. domains that are automatically filtered out). The export file is not group-specific.
Group Blacklist Entries: This item exports all entries on the group-specific blacklist(s). The export includes both addresses as well as rules according to which addresses are filtered (e.g. gmail.com, if all gmail addresses are skipped). One export file is created per group. It is necessary to select one or more groups.
Group Attributes: This item exports a list of all group attributes and their values. One export file is created per group. It is necessary to select one or more groups.
Domain Statistics: This item exports the accumulated domain statistics data. It is necessary to select one or more messages. By default, data can be exported for a maximum of 30 messages. The export can be extended to a maximum 100 messages.
Standard Job Definition
Group: This area defines whether the data export is limited to certain groups.
Specific Groups: This radio button opens the input field Groups. Individual groups are selected in this area.
Select Group: This button opens the window Select Group. In this window you can search for individual groups and add them to the list. The search can be completed more than once in order to select as many groups as desired on the basis of different search criteria.
Select All Groups: This checkbox selects all of the groups in the system for the data export.
Remove: This button removes the groups that are selected in the Groups list from the data export. Selected groups are highlighted in blue. Hold down the CTRL key to select multiple entries.
Remove All: This button removes all of the groups that are in the Groups list from the data export.
Group Category: This radio button displays the drop-down list Group Category.
Group Category: This drop-down list defines the group categories used for export. A group category can contain any number of groups. The group category is assigned in the group settings.
Messages: This areas defines the messages for which data is exported. This area is only displayed for export types that are message-related (for example, clicks, opens, domain statistics, etc. ).
By default, data can be exported for a maximum of 30 messages. To export information for more than 30 messages, use the parameter max-num-messages to define a maximum of up to 100 messages.
If you need information for a larger number of messages, use a Cloud Data Export or a Raw Data Export. The job stops the export if more than the maximum number of messages are selected. There is no warning if too many messages are selected.Messages: This list defines which messages are considered in the data export. Each of the selected messages is displayed in the field. To select messages, click Select Messages or All messages of selected groups.
Select messages: This button opens the window Search Messages. In this window it is possible to search for individual messages and select them for inclusion in the export. The search can be conducted more than once in order to select as many messages as desired on the basis of different search criteria.
All messages of selected groups: This checkbox includes all of the messages of the selected groups in the export. If an additional message is sent in one the selected groups while the activity is running, it will automatically be included in the export.
Include single messages: This checkbox includes all of the single messages of the selected groups in the export.Remove: This button removes the selected messages from the Messages field. Selected messages are highlighted in blue. Hold down the CTRL key to select multiple entries.
Remove All: This button removes all of the messages that are listed in the Messages field from the data export.
Custom Attributes: This drop-down list defines which custom user attributes (including the values stored in them) are exported. An attribute is selected for export by clicking on it. The attribute is highlighted in blue. Hold down the CTRL key to select multiple entries.
The standard attributes (email address, name, etc.) are always included in the export and do not need to be specified. Custom attributes are individually created for each system individually.Export all lists: This checkbox exports all of the customer user attributes in the system. When checked, the list of individual fields is not visible. If the checkbox is deselected, the list of individual attributes is displayed again.
 Cancel selection: This button deselects all of the individual custom user attributes.
Member Attributes: This drop-down list defines which member attributes (including the values stored in them) are exported. An attribute is selected for export by clicking on it. The attribute is highlighted in blue. Hold down the CTRL key to select multiple entries.
Member ttributes are individually created for each system individually.Export All: This checkbox exports all of the customer user attributes in the system. When checked, the list of individual fields is not visible. If the checkbox is deselected, the list of individual attributes is displayed again.
- Cancel selection: This button deselects all of the attributes.
Address: This input field defines the server where the export files are saved. A connection can be established to a server address over FTP (FTP, PFTP (passive FTP), AFTP (active FTP), SFTP, FTPS.
This address has the following format: protocol://user:password@host.port/url-path.
Example: ftp://joesample:1password@ftp.mapp.com/messagesLocal (development): This input field is used internally for system development. This field cannot be used by the end user. It is only possible to enter a local storage address in this field when you are in the developer's environment or with a local installation.
Encoding: This drop-down list defines the character encoding of the export file that is generated. Depending on the language that is used, the encoding must be able to display the appropriate characters. Attributes can store data in any language. The character coding of the export file must be able to display the special characters of the languages you use in your system. The magnifying glass opens the window Select. In this window you can make a selection from the available character sets.
File name: This input field defines the name of the export file.
Individual file names facilitate data management. For example, in addition to predefined names, (e.g. Clicks April to May), it is also possible to create dynamic name parts using placeholders.
<%group.name%> creates a file with the group name.
<%message.Name%> creates a file with the message name.
Example: Clicker_<%group.name%> creates an export file with the group name as part of the file name. For an export file in the group Sport, the file name is Clicker_Sport.Style sheet: This drop-down list defines the format of the generated export file. The format can be either XML or CSV. Two different CSV formats are available that produce files that use different separators. Separation characters can also be customized with parameters.
CSV (Tab): This style sheet creates a CSV file with a tab as separator.
CSVS: This style sheet creates a CSV file with a comma as separator.
XML: This style sheet creates an XML file.
Custom Style Sheet: This item allows you to select a custom style sheet that was created for your system. An input field opens to allow you to enter the name of the custom style sheet. This style sheet is for creating custom XML files. For CSV files, the separator can be customized using the parameter separator. Custom style sheets are an extra feature and are available for an extra cost. Contact your customer service representative to apply custom style sheets.
Save as ZIP: This drop-down list defines whether or not the exported file is compressed into a ZIP file.
No: This item saves the file without compressing the XML or CSV file.
Yes: This item saves the file as a compressed ZIP file.
Delta-Export: This drop-down does not affect the event-based job.
Export From: The input field defines the point in time from which data will be exported. Data dated before this time is not included in the export. The date format is YYYY-MM-DD. The start date is not a mandatory field.
 : This button opens a calendar. Clicking on the desired calendar date automatically inserts the correct date format in the input field Export From or Export To.
Export To:: This input field defines until what date data is exported. Data dated after this time is not included in the export. The date format is YYYY-MM-DD.
Extra Parameters for File Modification
This area adds additional fields for parameters. Parameters modify how the job is processed.
The first input field defines the parameter. The second input field defines the value that defines the parameter.
WARNING!
Enter the parameters exactly as listed here. The entries are case-sensitive.
Modification | Parameter | Value |
|---|---|---|
Change the separator in a CSV-file A standard CSV export has either a comma or tab as separator. The parameter separator defines a different separator. | separator | (Enter the desired separator.) Example: ; (semicolon). |
Define additional data for export Normally, the specific export type (openers, recipients, etc.) that is selected defines what data is exported. However, it is also possible to define a custom data export using the parameter fields. When using this parameter it is necessary to explicitly indicate what data should be exported from the system. | fields | (Enter the data to be exported.) Example: user.email, link_url. The data entered here must actually be available for export. For example, when exporting blacklist data, no data from the attribute user.email is available. This data cannot be exported with the parameter. |
Rename CSV header names When exporting data in a CSV file, by default, the header names correspond to the Engage databank names. The parameter heading overwrites these default names with custom names. Example: By default, the export file contains the following headers: user.CustomAttribute.key, user.CustomAttribute.custnumber, user.Email, user.LastName, user.FirstName. | heading | (Entry of header names in the order in which they should appear in the CSV file.) Example: Key, Customer ID, Email, Last Name, First Name. The export file is customized accordingly. |
Increase the number of messages included in the export By default, data is exported for 30 messages. The parameter max-num-messages increases the maximum number of messages. | max-num-messages | (Enter a number between 30 and 100.) Data for up to 100 messages is exported. |
Increase the number of days included in the export By default, data is exported for the last 100 days. The parameter max-report-days increases the maximum number of days. | max-report-days | (Enter a number, for example 150.) |
Send an XML version of the export report to a specific email address An XML version of the export report can be sent to a specific email address. | admin-report-email | Enter the email address. |
Define Delay
In this area, you can define a time delay between the event and the resulting job. If you define a delay, the system waits the specified amount of time after the event takes place before executing the event-based job. If you do not define a delay, the system executes the job immediately after the event takes place.
Hint:
Engage calculates the selection for an event-based job when the job is executed, not when the event takes place. When you define a delay, the selection is calculated after the delay
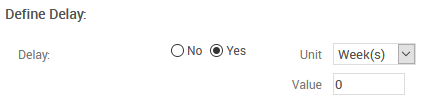
Delay: Defines whether there is a delay between the event and the resulting job.
No: There is no delay between the event and the resulting job. When Engage registers the event, the system executes the job immediately.
Yes: Creates a delay between the event and the resulting job.
Unit: Defines the unit of time with which Engage calculates the delay.
Value: Defines the duration of the delay.
Actions
The following actions are available:
Time Frame: Saves your changes and opens the Define Time Frame window.
Edit Event: Opens the Edit Event window.