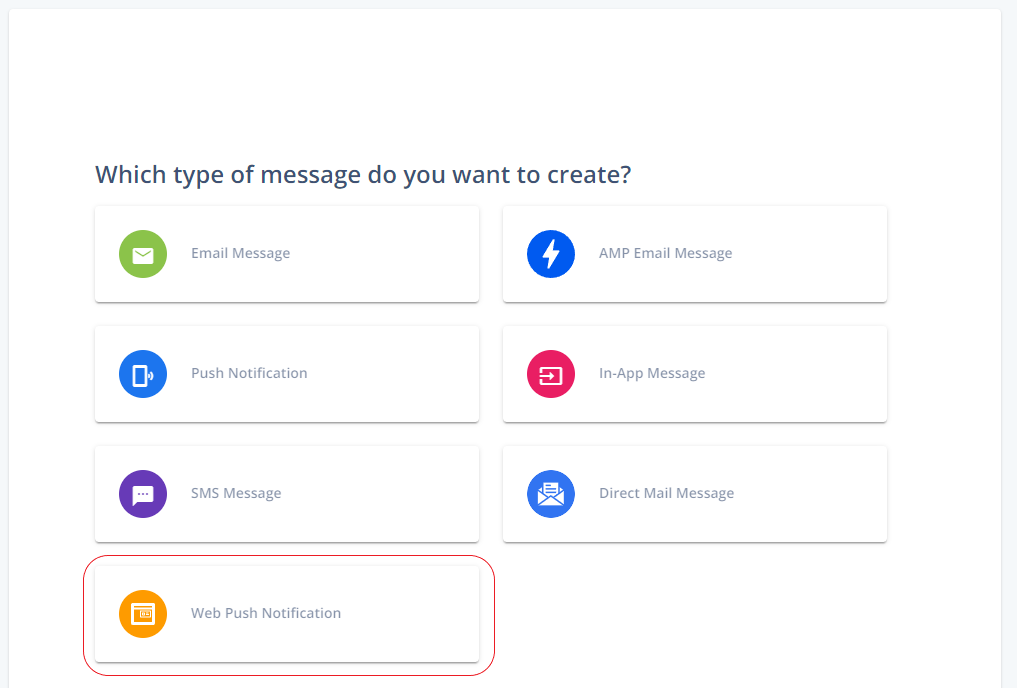
Go to Create New > Message > Web Push Notification.
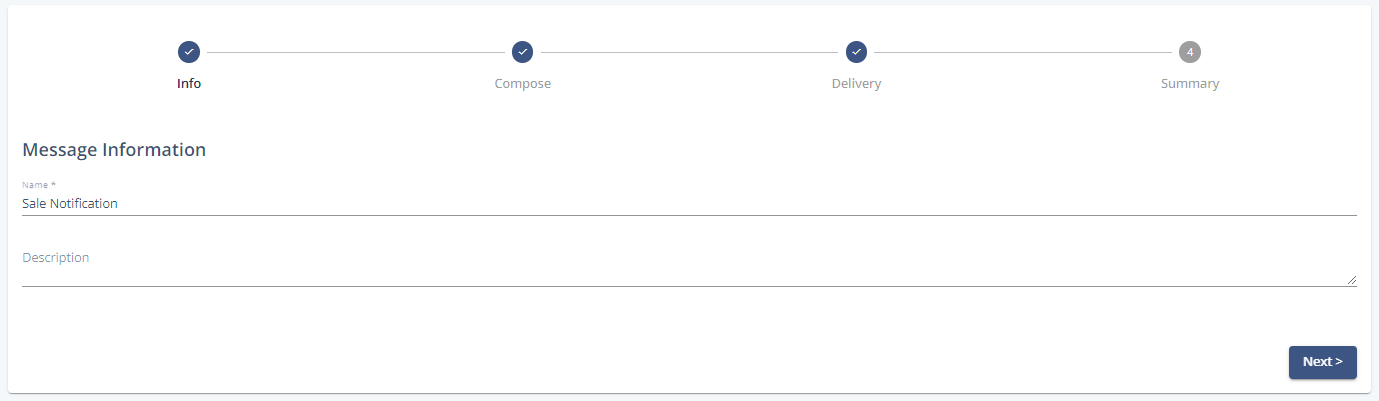
Give the notification a unique name. The description is optional.
Neither the name, nor the description are visible to your contacts.
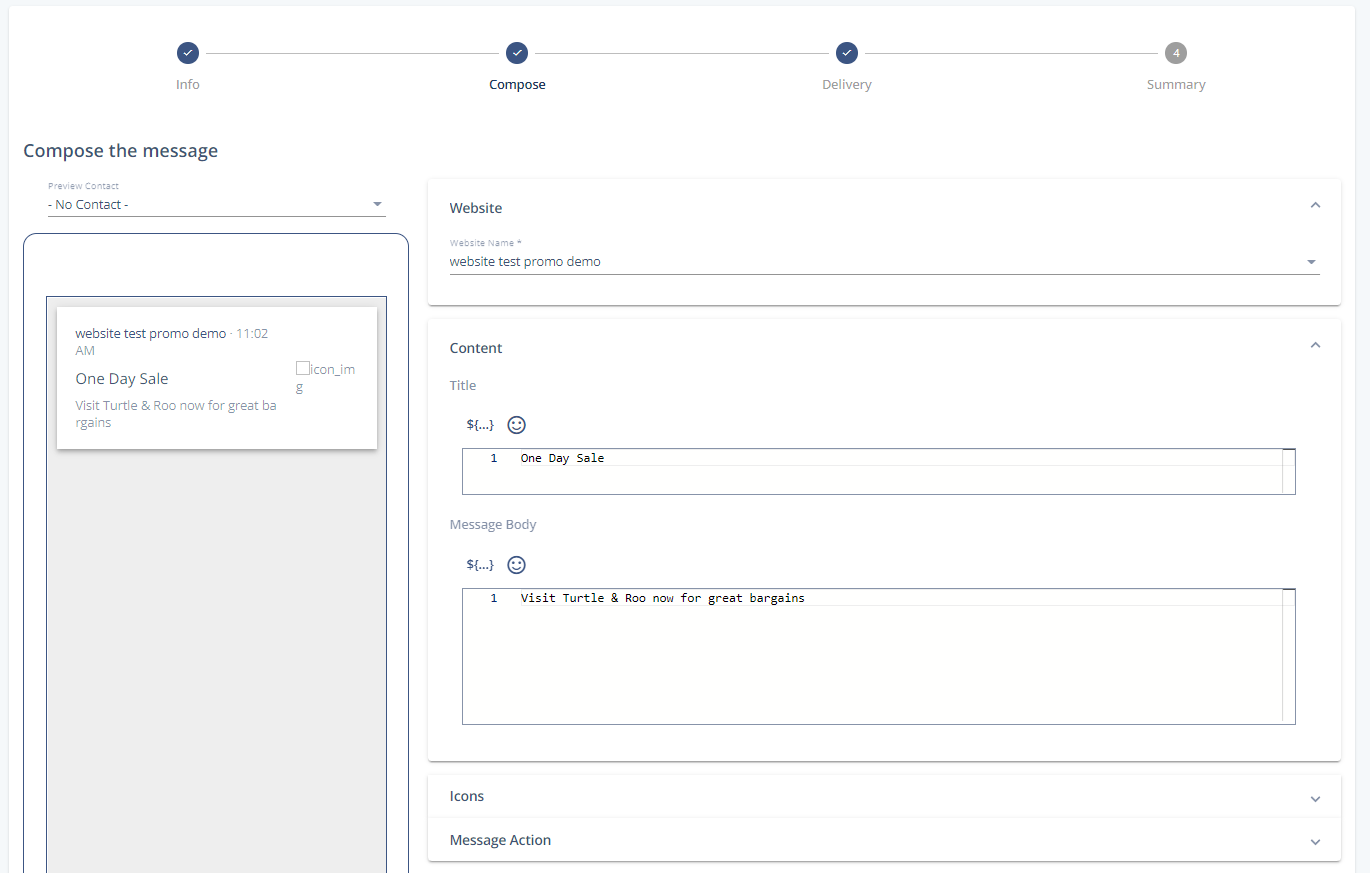
Choose the desired website channel you previously created.
Content: Enter a title and the body of the message that you want to send. Both can be personalized by adding recipient-specific content to the notification during the sendout.
Icons: Add an icon to your web push notification to make it more appealing. You can upload them, or select from the Content Store.
Message Action: Enter the name of the website you want to open when your contact interacts with the web push notification.
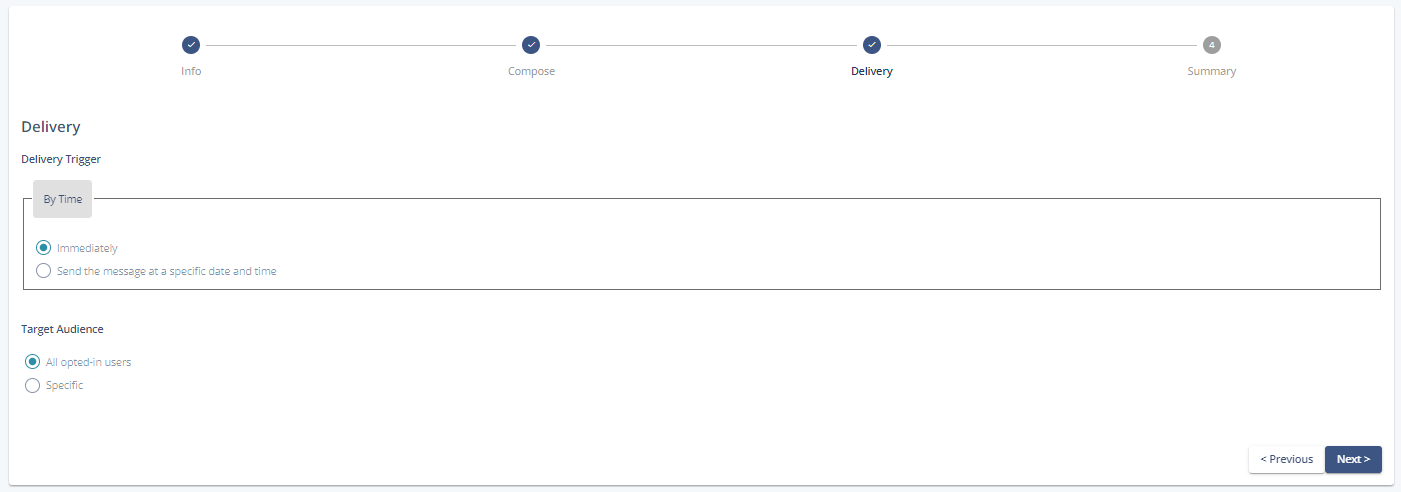
Delivery trigger: You can trigger the delivery of your web push notification by time: either immediately, or at a specific date and time. For the second option, you can select a specific delivery date, delivery time, and an appropriate time zone.
Target Audience: Choose whether you want to send the message to all of the opt-in users, or just to a specific selection. For the second option, you can choose among previously created selections.
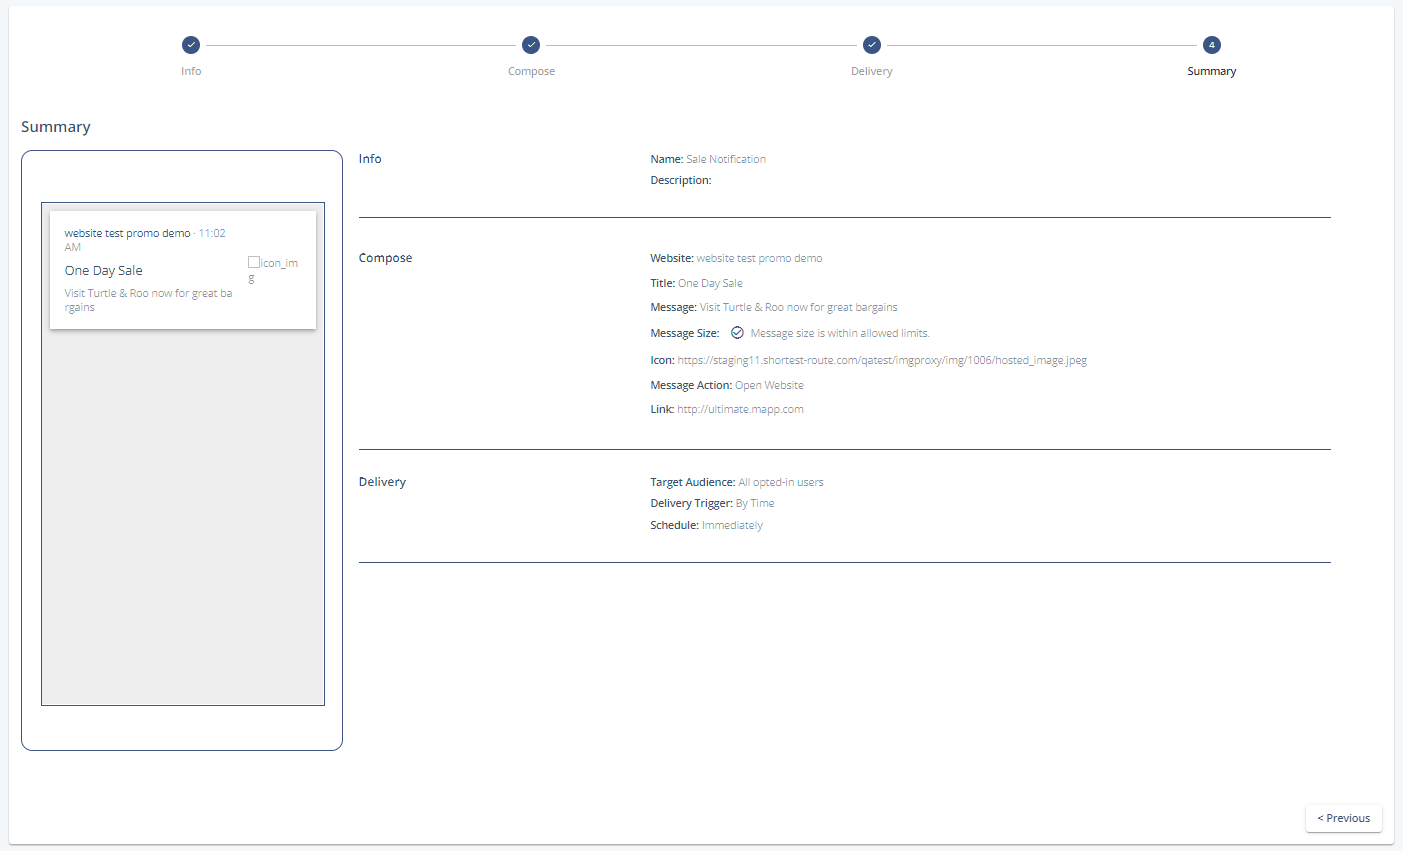
Summary: Gives you an overview of all of the previous steps.
Cookie Notice
We use technically neccessary cookies. For details, please have a look at: mapp.com/privacy