Getting Started With Shopware and Mapp Connect
General information
The Mapp Engage plugin for Shopware allows you to:
- Send emails or transactional messages based on Shopware events.
- Send external event triggers to your Whiteboard.
Procedure
Setup in Mapp Engage
A) Create Groups
You must create two groups for data synchronization. You will need them later during the plugin setup.
Click Groups > Create New and create two groups:
- one for customers called, for example, "Shopware_customer"
- one for subscribers called, for example, "Shopware_subscriber"
B) Prepare messages
To create the message in Engage, follow these steps:
- Go to Messages > Prepared Messages > Email and create a new message.
Compose the transactional emails you want to send. For example, for order creation, update, refund, or cancellation. You will need them at a later stage of the configuration. For more information, see Prepared Messages.
C) Create integration between Engage and Shopware
The connection can be set up for all sales channels or each one separately.
- Go to Data Management > Mapp Connect.
- Click Add New Integration.
- Select Type Shopware.
- Enter the name of the connection and click Create.
The Integration Settings tab opens to the Overview tab. You can still change the name of the integration here and add a description.
(optional) Check the box if you want a Whiteboard to be triggered when the contact's mapping attributes change.
Click Regenerate Secret. Copy the secret key and save it for future reference. You will need it to authenticate the connection between Mapp Engage and your plugin.
Click Save.

D) Configure Mapping
A mapping is a list of imported data objects from Shopware. The default types of import for Shopware, as well as standard attributes, have already been added. The mapping for the Shopware integration only supports the subtypes Transaction, Newsletter, and User.
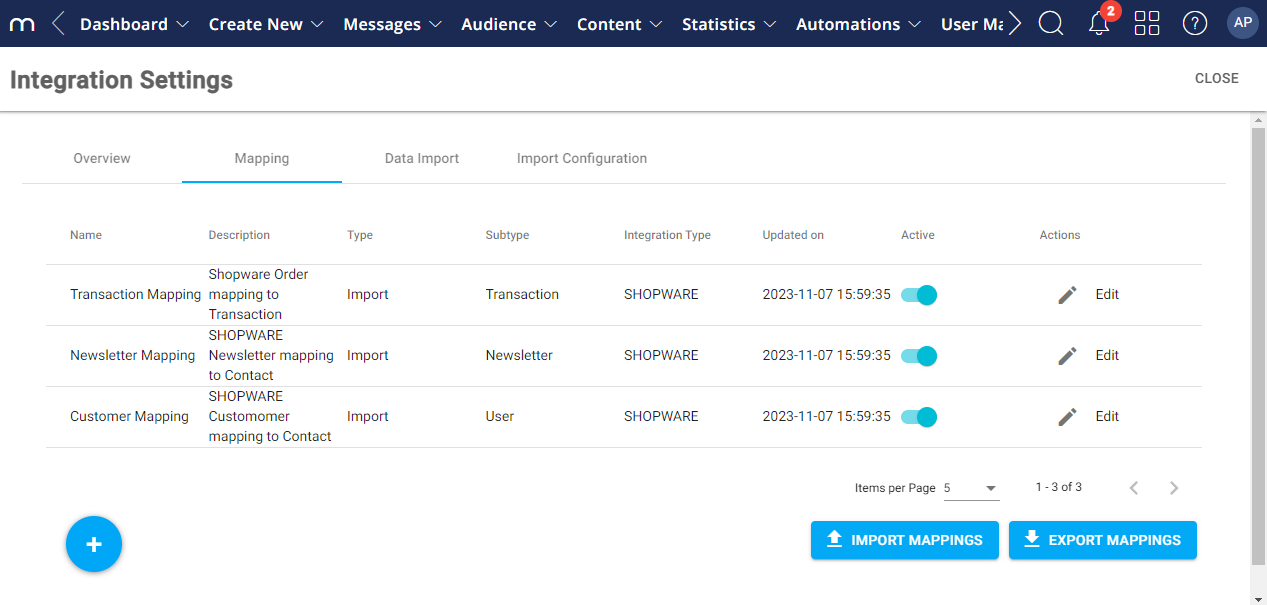
For more information, see Mapping.
Setup in Shopware
E) Install the Plugin on Shopware
- Download the Shopware plugin from Github.
- Log in to your Shopware account and go to Plugin > Upload.
- Upload the zip from GitHub.
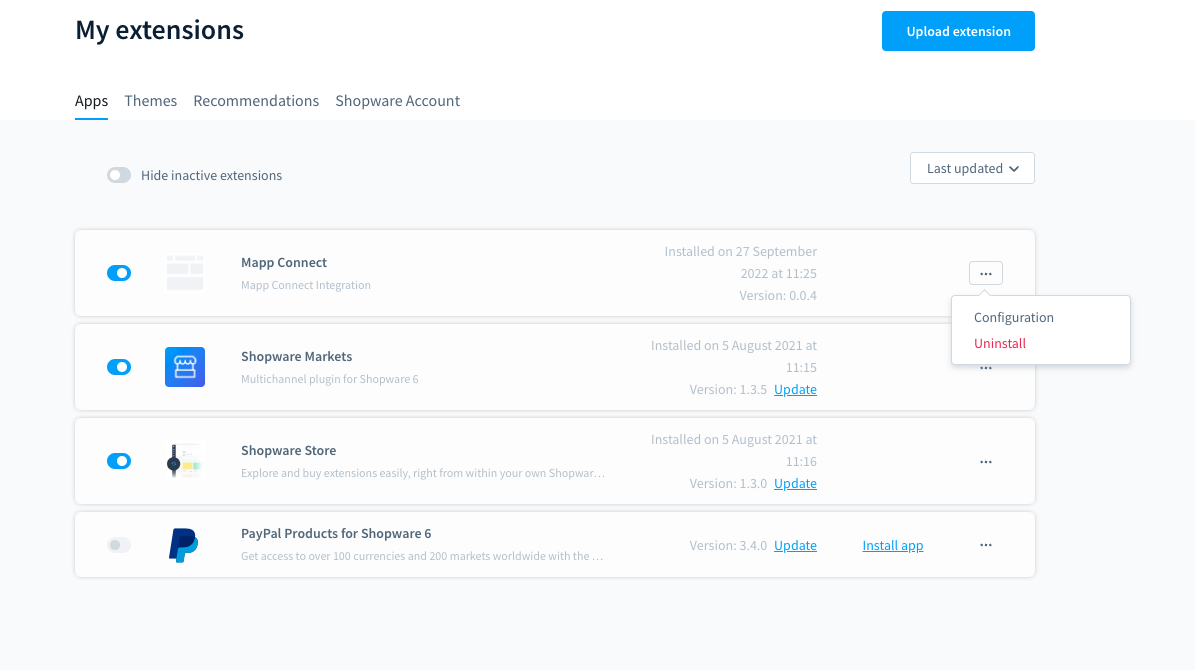
- In Shopare Admin, navigate to Extensions > My extensions > Mapp Connect.
- Click on the three dots and then on Configure.
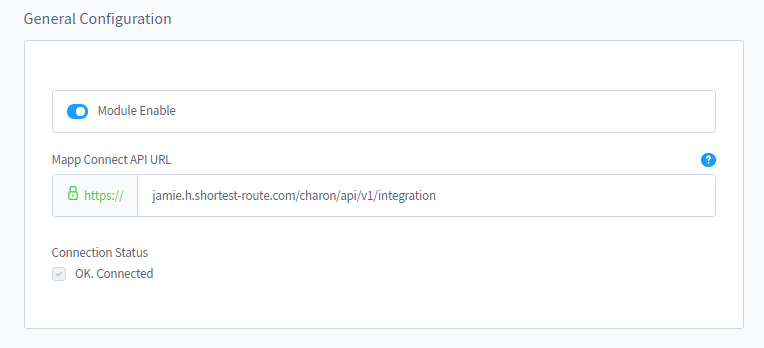
E) General Configuration
Enable the module and choose the environment.
| Setting | Details |
|---|---|
Module Enable | Here, you can activate and deactivate the Mapp Engage module. |
Mapp Connect API URL |
For more information, see Mapp Engage Clusters and Time Zones. |
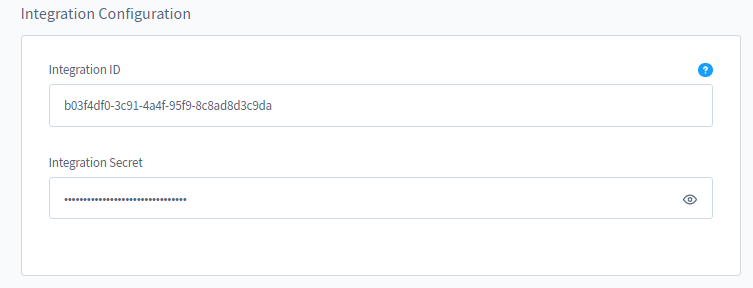
F) Integration Configuration
Enter the Integration ID and Integration Secret generated in Mapp Engage. Click Save.
Select what data types you would like to send to Mapp Engage.
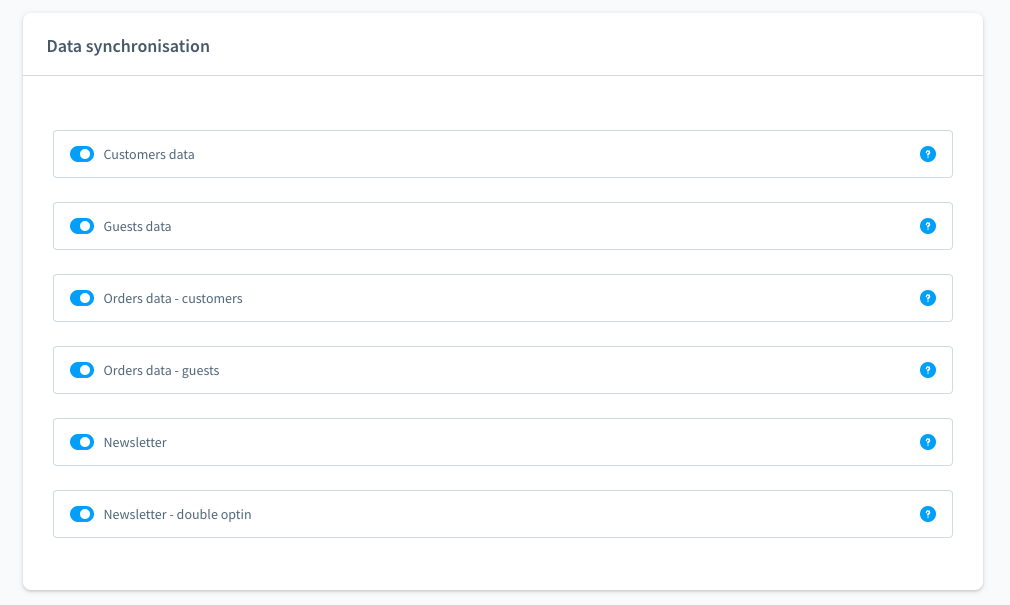
Field Description Customers data Creates a user event and adds/updates contact profile in Engage, and he's added to the "Customers" group. Guest data Creates a guest event and adds/updates contact profile in Engage for users who create the order as a guest, and he's added to the "Guest" group. Orders data - customers Creates Transaction events and stores order data in Transactional Related Data for customers' orders. If in the Business Events settings, you set prepared message (email) for event checkout.order.placed also order an email will be sent to the user. Orders data - guests Creates Transaction events and stores order data in Transactional Related Data for guests' orders. If in Business Events settings you set prepared message (email) for event checkout.order.placed also order an email will be sent to the user Newsletter Creates newsletter event and adds/updates contact profile in Engage, and he's added to the Newsletter group. Double opt-in can be set up on the group level Newsletter - double opt-in Allows you to Enable or Disable double opt-in for the newsletter. For more information, see Set up Double Opt-in with the Email Channel.
Select which groups should add users into categories such as customers, guests, and newsletters.
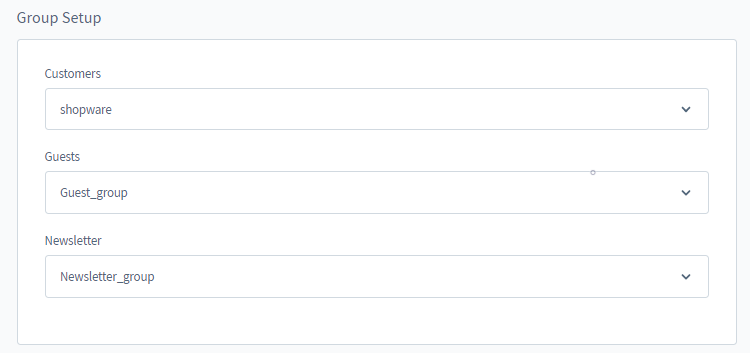
- Click Save.
You can now set up events in Shopware and start using the Shopware business events.