Configuring and Mapping with Google Tag Manager
To configure the plugin for usage with Mapp Intelligence via Google Tag Manager, follow these steps:
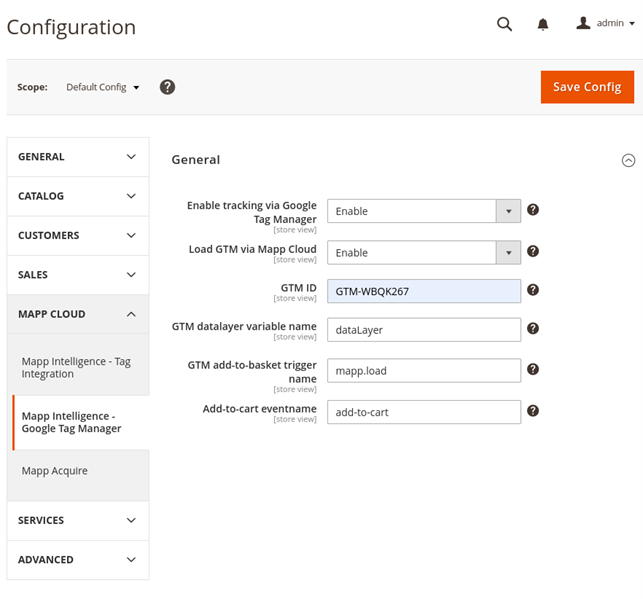
- In the admin panel, go to Stores > Configuration.
- In the plugin list, select Mapp Cloud > Mapp Intelligence - Google Tag Manager.
- If you haven't loaded Google Tag Manager somewhere else: enable Load GTM via Mapp Cloud and enter the GTM ID in the corresponding field.
- In most circumstances, all other settings can be left to defaults (see below).
Setting | Description |
|---|---|
Enable tracking via Google Tag Manager | Activates Mapp Intelligence Tracking via Google Tag Manager |
Load GTM via Mapp Cloud | If Google Tag Manager is not loaded somewhere else (other plugins, theme, etc.), activate this option |
GTM ID | If you want the Mapp Cloud plugin to load the Google Tag Manager script, you need to enter the ID here. It is GTM-XXXXXX and you can find it in the code snipped provided in your GTM container settings. |
GTM data layer variable name | If you use a variable other than ‘dataLayer’ in your GTM configuration, you can enter the name here. |
GTM add-to-basket trigger name | ‘mapp.load’ is the default trigger name for Page views. If you want to use a different trigger for add-to-cart events, you can define the trigger name here. |
Add-to-cart event name | This option is only visible if you use the default ‘mapp.load’ trigger name for add-to-cart events. The Mapp Cloud plugin will automatically convert those requests to events, hence you can define the event's name here. |
Mapping data
The easiest way to map tracking data via Google Tag Manager is by using the Mapp Cloud template. After activating the plugin in Magento 2 / Adobe Commerce as described above, open the Google tag Manager interface (https://tagmanager.google.com/). Go to the container that is loaded by the plugin, and follow these three steps to activate tracking:
- Create variables.
- Create a trigger.
- Import and configure the Mapp Cloud tag.
1) Create Variables
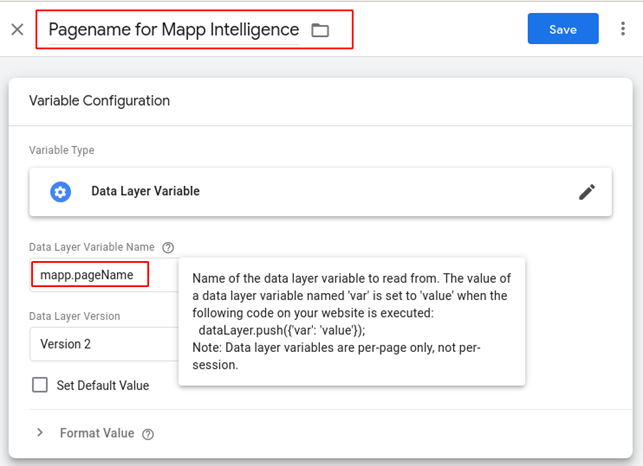
Click “Variables”, then “New”. Use “Data Layer Variable” as the type. Enter a name of your choice and the Data Layer Variable Name. For the name of the page, it would look like this:
The available Data Layer Variable names are:
| Attribute | Description | Suggested Mapping |
|---|---|---|
mapp.pageName | URL without parameter. | Page → Page name |
mapp.pageTitle | The meta title of the page. | Page → Predefined page Parameter → title |
mapp.customerId | Sha256 hash of the customer's email address | User → User ID |
mapp.gender | '1' for male and '2' for female (this will only work if the technical name for Salutations is for male Mr or Herr, and Ms, Mrs, Miss or Frau for female (see Settings → Salutations in Shopware 6 Backend). Only available if the customer is logged in. | User → Predefined URM category → Gender |
mapp.contentCategory | Depending on where you are the values can be: Checkout, Catalogue, Account, Home, Content. | Page → Content Groups |
mapp.contentSubcategory | Depending on where you are the values can be: Product Overview, Product Detail, Internal Search, or Landing Page. | Page → Content Groups |
mapp.pageNumber | The number of pages in product lists and search results. | Page → Page Parameter |
mapp.internalSearch | Search term on the search result page. | Internal Search → Search term |
mapp.gtmProductArray | Object with product data | E-Commerce → Products → Product data |
mapp.currency | The currency ISO code. | E-Commerce → Order → Currency |
mapp.orderId | The ID of an order. | E-Commerce → Order → Order ID |
mapp.totalOrderValue | The total value of an order, incl. taxes. | E-Commerce → Order → Order value |
mapp.couponValue | Value of coupons during order. | E-Commerce → Order → Coupon Value |
Those are just the most important ones. Depending on your shop configuration, you might find much more data that can be tracked. Use the GTM debugger and look for Data Layer variables that start with “mapp.”.
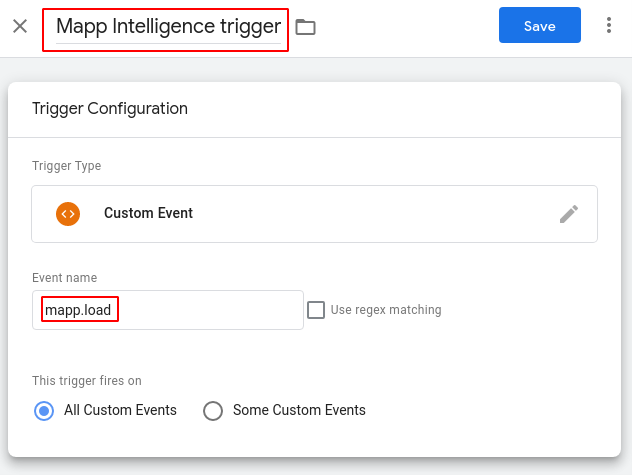
2) Create Trigger
Go to Triggers >New. Select Custom Event as the type, give it a name, and enter “mapp.load” as the event name:
3) Import & configure the Mapp Cloud Tag
Go to Tags> New. When picking the type, click Discover more tag types in the Community Template Gallery and search for “Mapp Cloud”. Add it to your container. Now add your mappings, track id, and track domain to configure. Set the trigger as the custom trigger you just created. Save and publish the container – your basic tracking is now working!
Customize product tracking
When mapping mapp.gtmProductArray to products, you get the product id, status, cost, and quantity. However, you might want to track additional information, like the real product name. In order to do that, you need the Mapp Intelligence Product Array custom variable. Once more, go to Variables > New. When asked for the type, click Discover more variable types in the Community Template Gallery. Then search for Mapp Intelligence and pick Mapp Intelligence Product Array. Next, configure the new variable.
First, map the mapp.gtmProductArray to Product array. Now enter the name of variables as you know them from the dataLayer, but without “mapp.”. So if you want to map the real product name as product category 1, you’d do it like this:
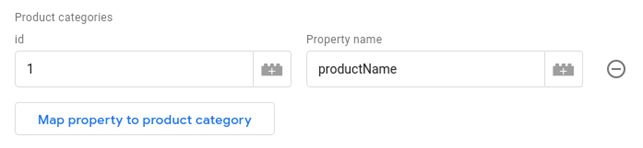
All data from the dataLayer is available within gtmProductArray and can be mapped here, just remove “mapp”. You can keep product status unmapped, the Magento plugin will take care of the status.
Advanced configuration – a separate trigger for add-to-cart events
For advanced usage, there is the option to set a different trigger name for add-to-cart events. If you set something other than “mapp.load” as the trigger name for add-to-cart events in the plugin configuration, you can create another trigger for those add-to-cart events and therefore fire a different tag when those events occur. For example, you can import the Mapp Cloud tag a second time, and set it to “Event” for this trigger, allowing you to completely customize the add-to-cart events.
However, in most circumstances, the default behavior should prove sufficient.