Edit Mapping
Procedure
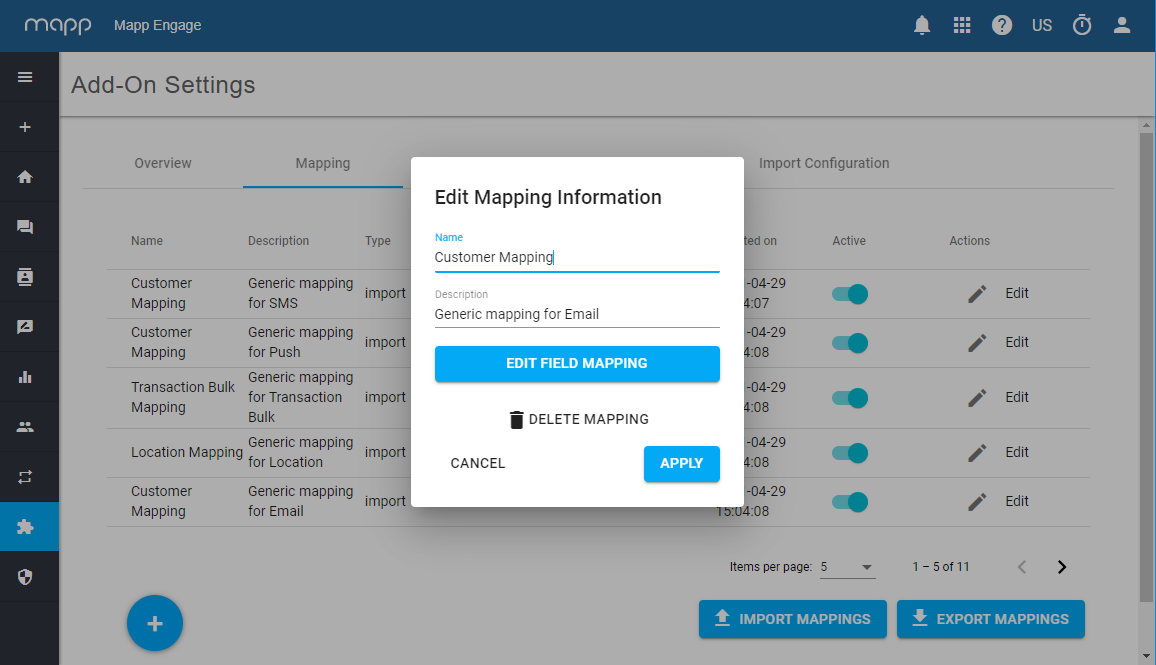
- Go to the mapping you want to edit and click Edit.
- Edit the name in the pop-up window that appears. The description is optional.
- To configure the mapping, click Edit Field Mapping.
- Click the plus sign.
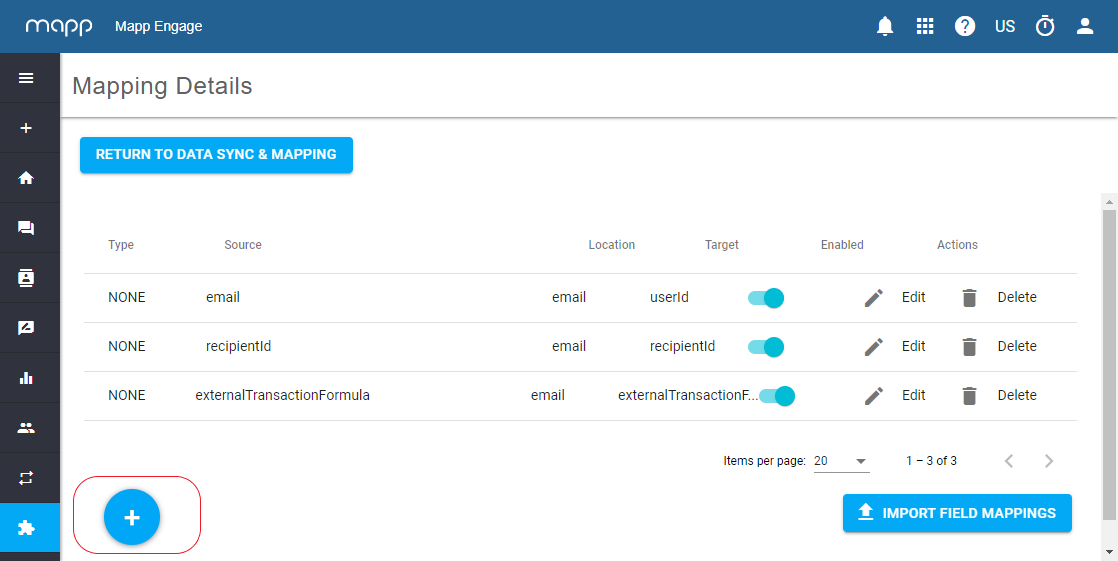
- The Edit Mapping Information window opens. Here you must define the details of the mapping for each source (data in your API call).
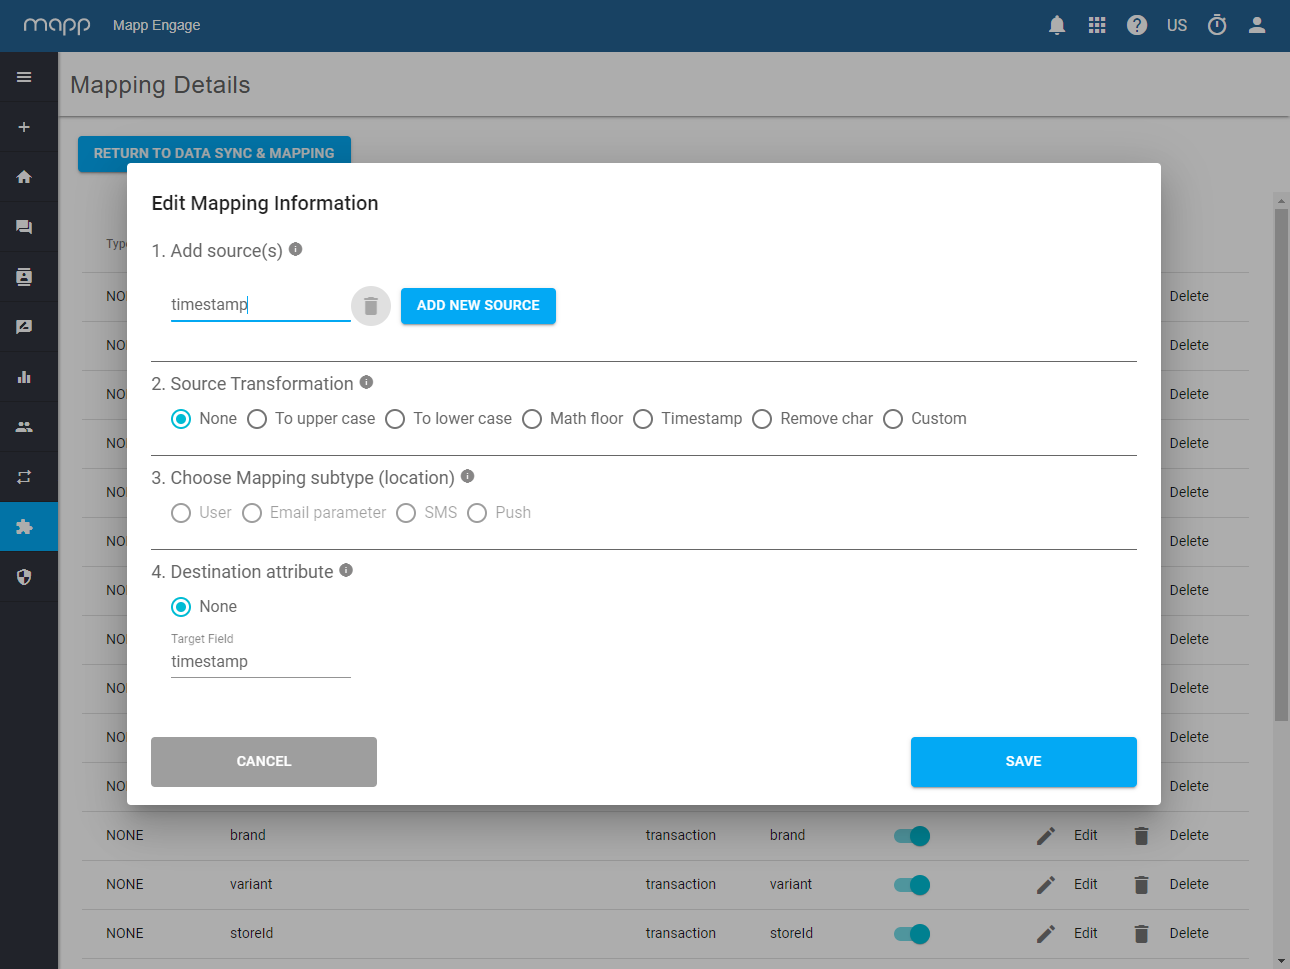
- Add source(s) lets you specify one or more data sources that are included in your API call. For example: email, phone number, etc.
- Source Transformation lets you define whether any data should be changed during import. Read more about data transformations here.
Choose Mapping subtype lets you chose from four options: User, Email, SMS and Push.

This subtype matches the event type name from the API call. If there is no mapping for the even type, the call won't be processed.
For example, to send an email, you have to define a mapping with the subtype Email.
Destination attribute lets you specify where the imported data will be mapped. For every mapping subtype, all the required fields are already defined by default in Mapp Engage. All you need to do is add the matching name from your JSON payload (source), and if needed, add additional values. Your custom and member attributers must be defined in Mapp Engage (see Attributes).

Mapping sources and destinations are case sensitive!
Example
| JSON payload | User mapping |
|---|---|
CODE
|
|
Edit User Attributes
Under Choose Mapping subtype (location) select User.
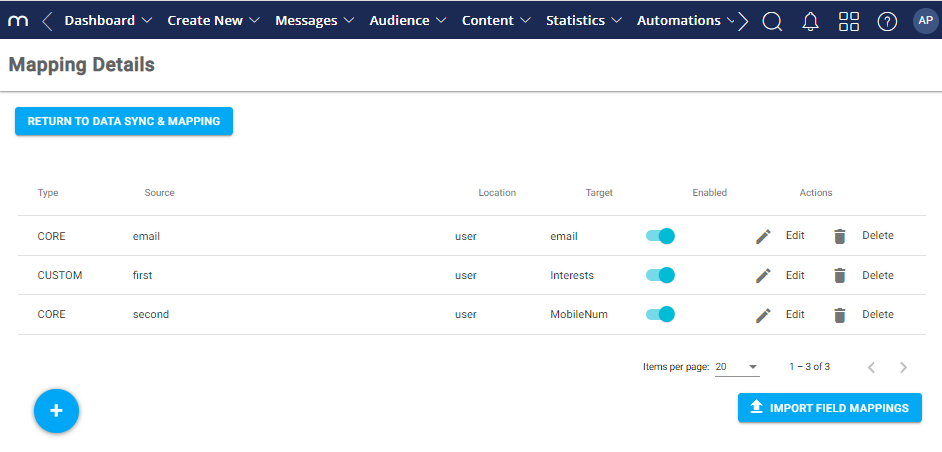
- Under Destination attribute select the type of attribute: Core (Standard), Addon, Custom, Member, or Related Data.
- Core (Standard) - select a standard attribute from the drop-down list.
Addon - select an attribute, or create a new one.

Addon attributes are not visible on the UI or email personalization. They can be used in Segmentation Builder.
- Custom - select a custom attribute from the list.
- Member - enter group_id:attribute_name
- Related Data - select the required related data table and select the column where you want to store the imported data.
- Click Save.
Mapping Subtypes
Subtype | Description |
|---|---|
| User | Allows you to map source data into a user profile using five attribute types: core, custom, member, and addon. |
| Allows you to send an email (prepared message) and optionally, map source data as an email parameter used in the prepared message template. | |
| Transactions | Allows you to map source data with the default structure of the Transactional Related Data Table. |
| Wishlist | Allows you to map source data with the default structure of the Wishlist Related Data Table. |
| Abandoned Cart | Allows you to map source data with the default structure of the Abandoned Cart Related Data Table. |
| Location | Allows you to map source location data with the default structure of location in the metadata service for the geofence functionality. For more information about the geofence functionality, see Location Management. |
| SMS | Allows you to send an SMS (prepared message) to the contact using email or mobile number as an identifier. |
| Push | Allows you to send a push notification (prepared message) to the contact using email as an identifier. This requires adding the mobile app ID in the API call. |