Send a Flash-Sale Announcement via Web Push
With web push notifications, you can stay in touch with your audiences even if they are not currently visiting your website. This article demonstrates how you can use the web push channel to inform your audience about a flash sale in your online store.
Prerequisites
- An active Firebase account.
- Web push activated on your website.
For details see our Getting Started Guide.
Procedure
A) Set up Web Push Channel in Mapp Engage
- Go to Administration > Channels > Websites.
- Click Create Website Channel.
Give the channel a name.
Item Description Name Mandatory, unique channel name, used to identify the website channel within the system and is not visible to your contacts.
Description Optional, also not visible to your contacts. Enter the FCM Credentials: the FCM Json Key. The following video shows how to generate the Key in Firebase. For more information see Firebase Cloud Messaging.
 If you didn't provide a FCM Json Key, or if you provided an invalid one, you won't be able to activate the channel upon the last step (Summary). Instead, you will only be able to Save the channel or Close the creation process. In case of a valid FCM API Key, you will be able to first Activate the channel before saving it and closing the process.
Click Next.
A Summary page gives you an overview of all of the previous steps.
B) Compose the Web Push Notification
- Go to Create New > Message > Web Push Notification.
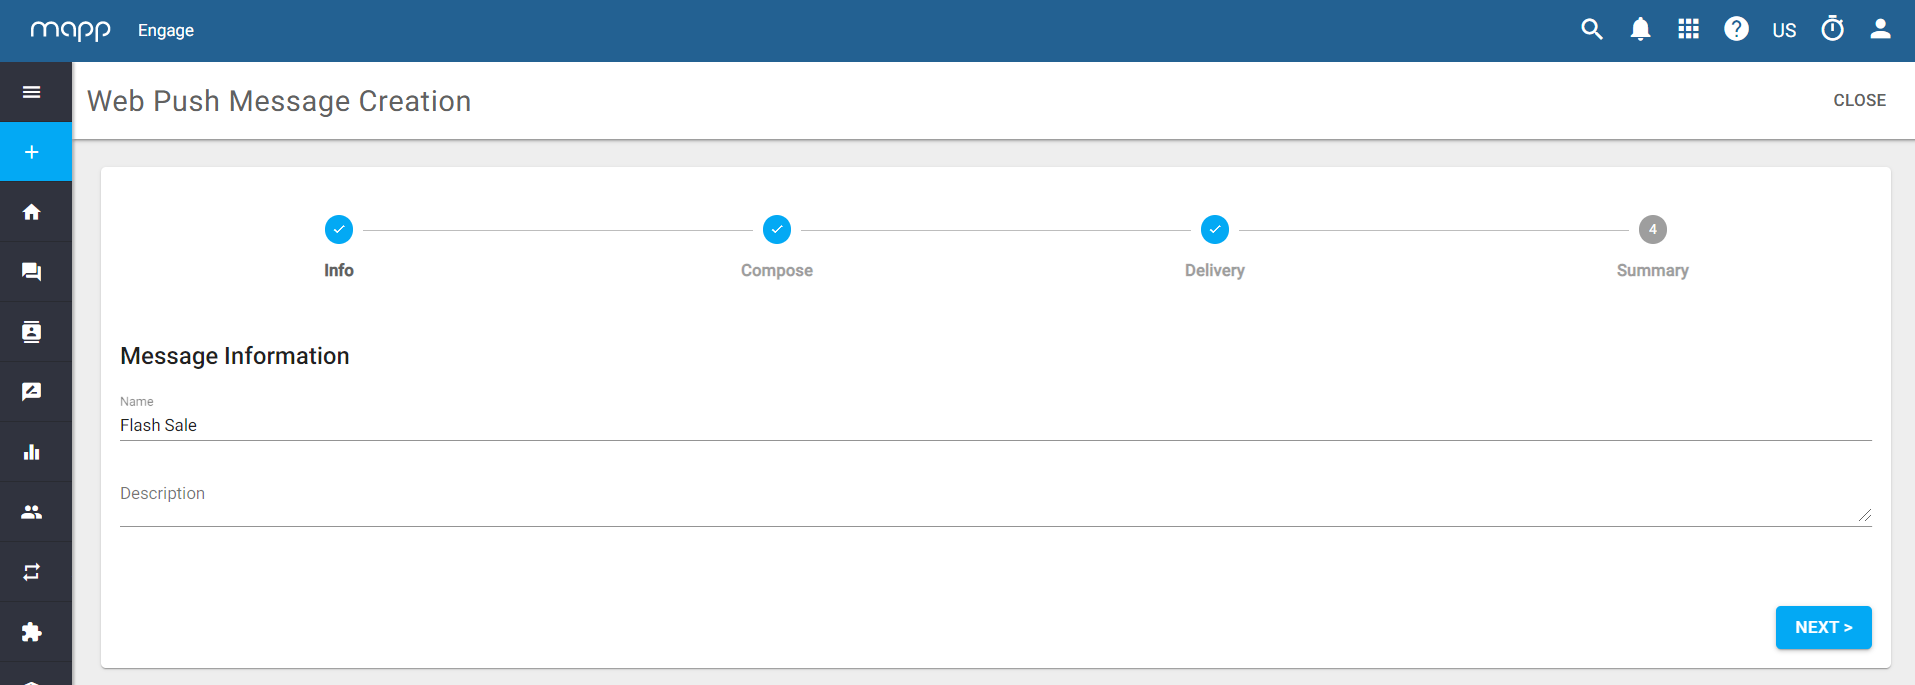
Give the notification a unique name. For example "Flash Sale" and click Next.
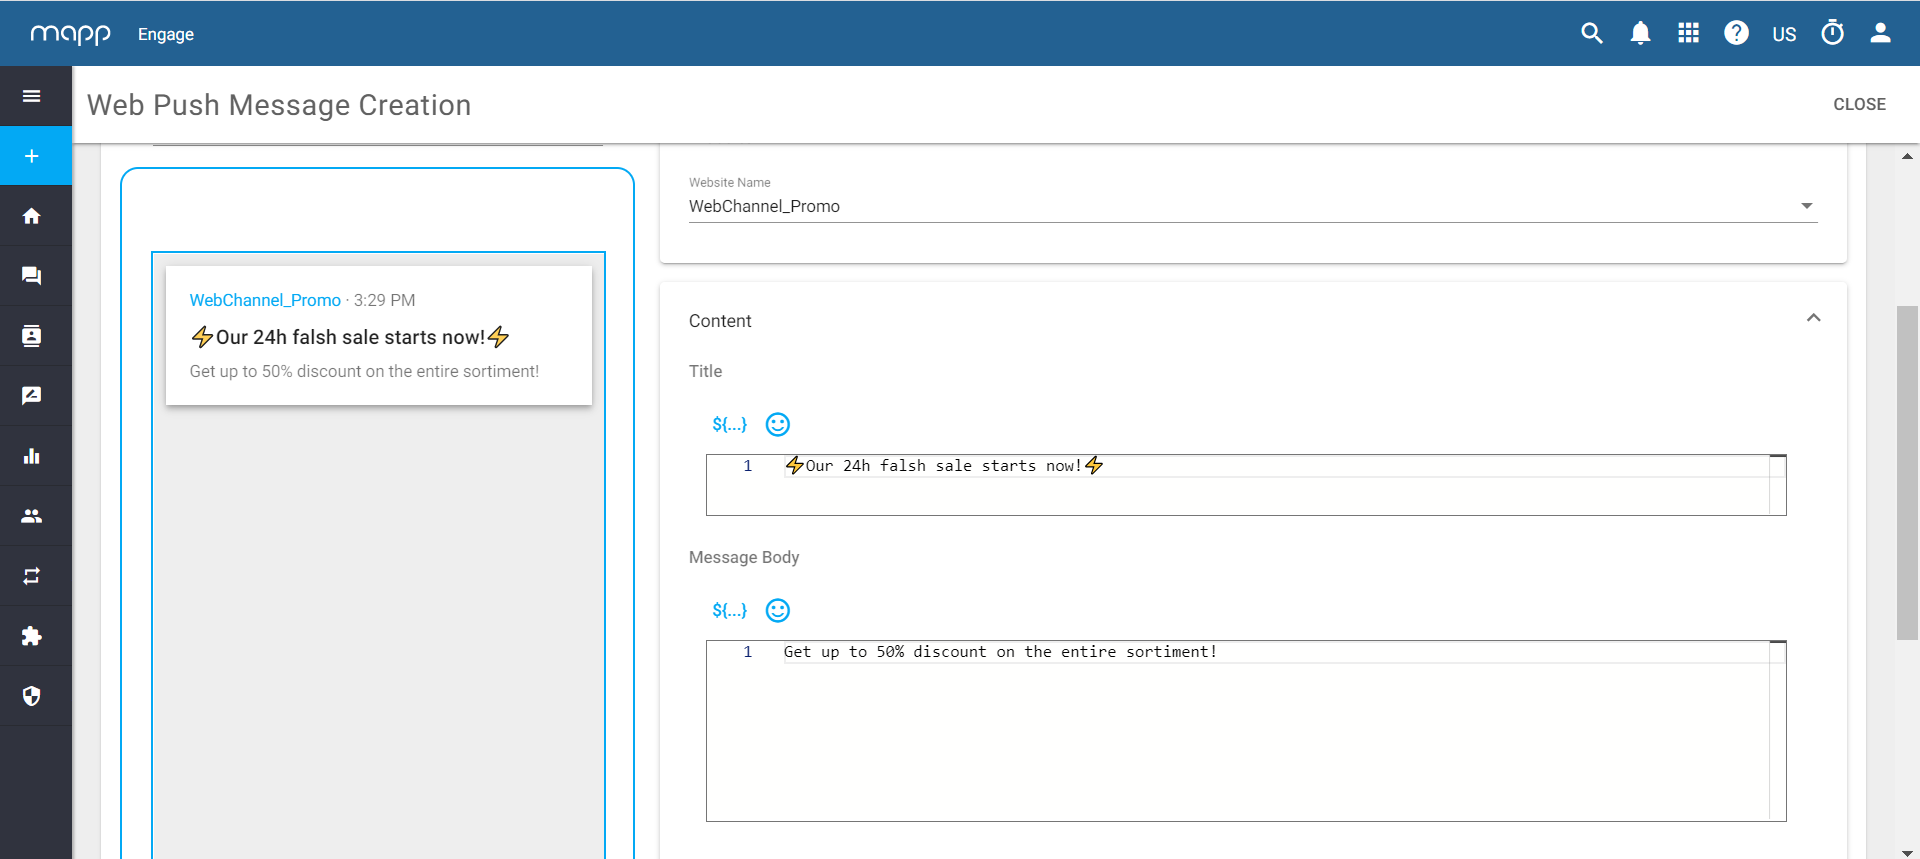
Choose the desired website channel you previously created. In our case, the channel is called "WebChannel_Promo".

Enter a title and the body of the message that you want to send.
Optionally, you can add an icon by either uploading it, or selecting one from the content store.
Enter the name of the website that should open when your contact interacts with the web push notification.
Check your message preview in the panel on the left and click Save.

Click Next.
Now specify the delivery date - in our case a specific time when our flash sale starts.
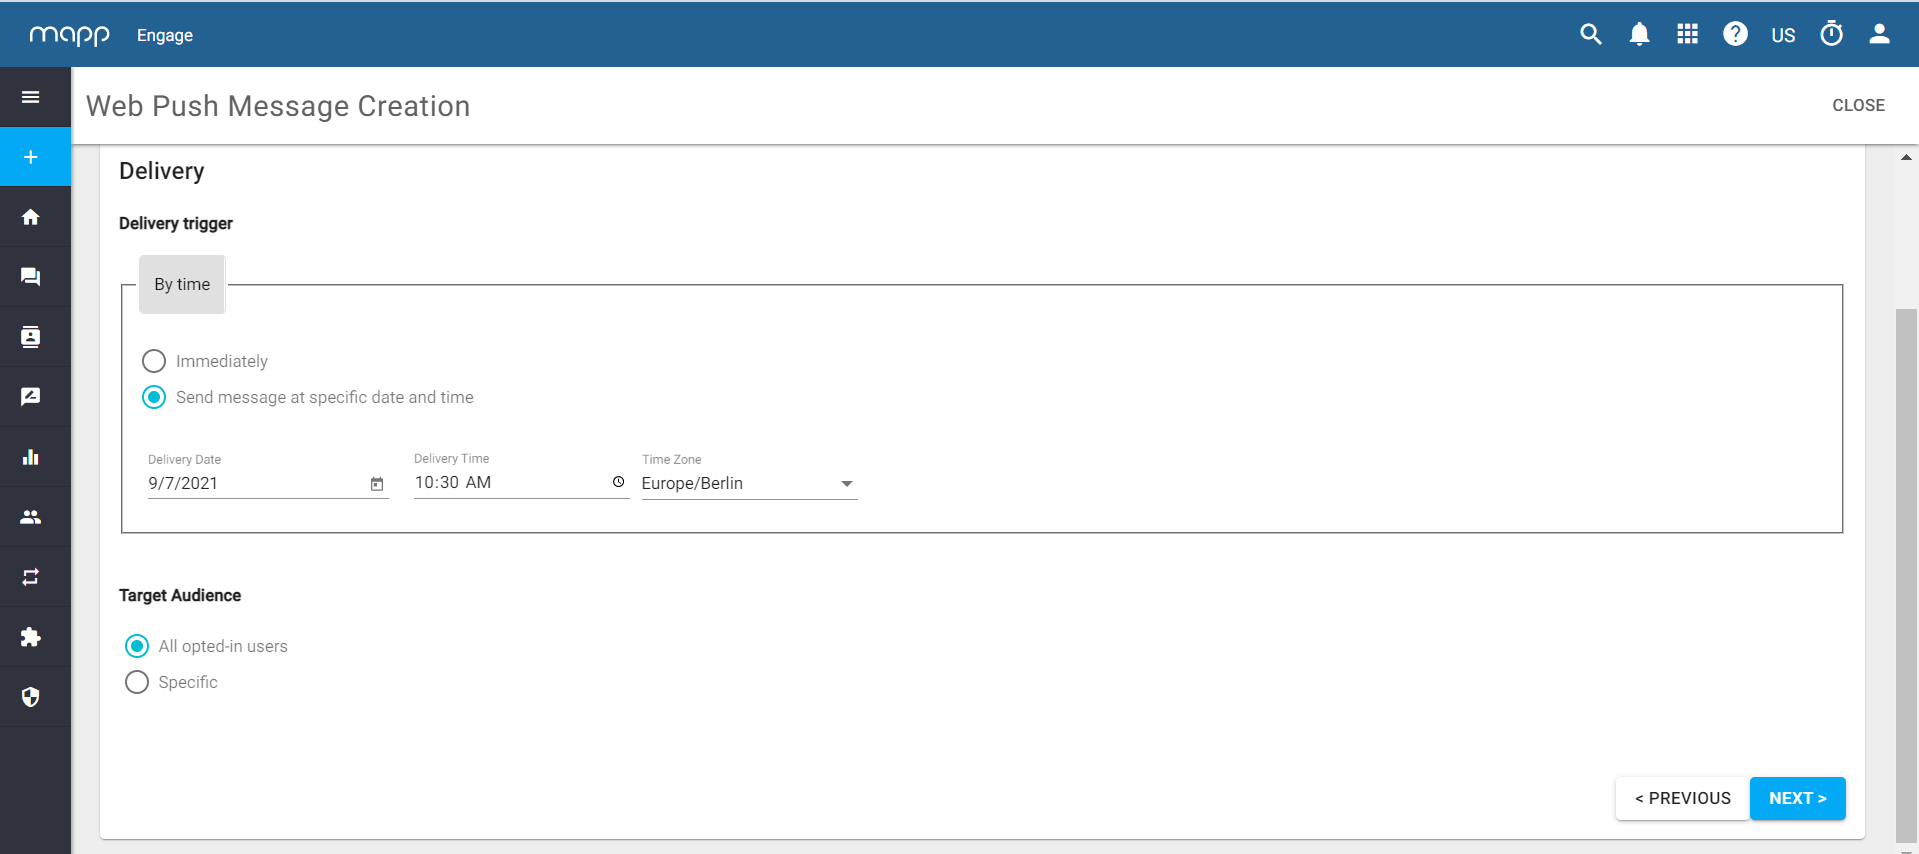
Select the audience. In our case, the notification will be sent to all opted-in contacts. Click Next.
You can see an overview of the notification along with its status which will be set to Completed once it is sent.

C) Monitor Message Statistics
To monitor message statistics go to Statistics > Group Messages > Web Push and click on the three dots icon in the Action column to view statistics. For more information see Web Push Channel Statistics.