It is possible to track events manually. This allows the tracking of non-HTML links (e.g., buttons, Ajax elements)

Example Code and Requirement

Let us imagine the following construct: upon clicking a button on your page, an event is triggered and sends some data to the GTM data layer.

The code on the website code could look like this:

<button id="event_button">Some event</button>
<script>
	document.getElementById("event_button").addEventListener("click", () => {
		window.dataLayer = window.dataLayer || [];
		window.dataLayer.push({
			event: "Socialmedia_Button",
			eventName: "Instagram",
			eventInfo: "Position2"
		});
	});
</script>
XML

We have

  • an event ('Socialmedia_Button')
  • data ('eventName' and 'eventInfo')

The requirement: we want to track the data of this event ('Socialmedia_Button'), whenever it occurs.

We want eventName ('Instagram') as the name of the event in Mapp Intelligence, and we want to track eventInfo ('Position2') with an event parameter. Using an event parameter offers more flexibility in analysis.

A) Creating an Event Parameter in Mapp Q3

 Click here to expand...

Since we are using a custom Event Parameter, we first need to set it up in Mapp Q3. Find more information on this page.

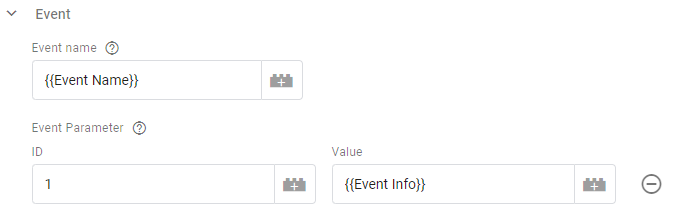
We gonna use this setup:


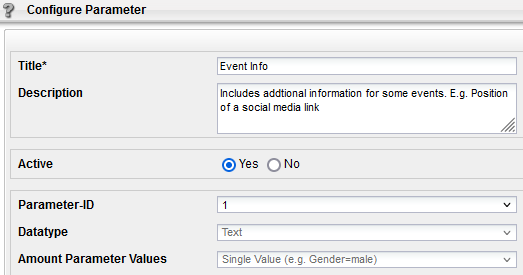
Please remember the Parameter-ID, in our example '1'. We will need it in the last step, when we gonna map the data.

B) Setting up Custom Events and Variables

 Click here to expand...

Set up your Google Tag Manager to support the requirement given above.

  1. Create a custom trigger. Click Triggers > New > Choose a trigger type... > Other > Custom Event and enter the event, 'Socialmedia_Button' in our example:
  2. Name it (e.g., 'Socialmedia_Button') and save it.
  3. Next, we need to configure the data.
    Click Variables > new > Choose variable type > Data Layer Variable and set the variable name to 'eventName'.
  4. Save it as variable 'Event Name'.
  5. Do the same with 'Event Info': set the data layer variable name to 'eventInfo' there.

Now we have one custom trigger and two custom events.

C) Creating the Mapp Intelligence Event tag

 Click here to expand...

Next, we map the data to Mapp Intelligence.

  1. Create a new tag and pick the Mapp Cloud Tracking Tag from the gallery. Find more information on the basic implementation page.
  2. Select the Request Type 'Event'.
  3. Map the two variables like this:


  4. Finally set the trigger to the custom trigger configured earlier:


Done!

Make sure that the Smartpixel code is loaded when the event is triggered. See how to set the code up here.