E-Commerce
On this page, we simulate a more complex track request. This will include order-, product-, and customer tracking.
Besides the Smartpixel GTM template, we will also use the Mapp Intelligence product array variable template, which helps to map product data to the Smartpixel.
Data Layer
We will grab the data from our data layer. Let's say we fire the custom event 'order' via GTM, and with that event, we provide all the data we want to track.
This can look like this:
window.dataLayer = window.dataLayer || [];
window.dataLayer.push({
    'event': 'order',
    'user-data': {
        email: "user@example.com"
    },
    'ecommerce-data': {
        'metainfo': {
            action: "confirmation",
            orderNumber: 'abc-1234',
            value: 111.94,
            currency: 'EUR'
        },
        'products': [
            {
                soldOut: false,
                category: "Category A",
                variant: "Variant A",
                id: "1234567",
                name: "Product A",
                price: "11.95",
                quantity: "1",
            },
            {
                soldOut: false,
                category: "Category B",
                variant: "Variant B",
                id: "ABCDEF",
                name: "Product B",
                price: "99.99",
                quantity: "1",
            }
        ]
    }
});So we have all the data we want to track available in our dataLayer. Just like in the basic implementation tutorial, we will now create variables to extract the data from the data layer and map it to Mapp Intelligence.
| Name | Data Layer Variable Name | Mapping |
|---|---|---|
| customer email | user-data.email | Customer Data > Customer Id (email address will be hashed automatically) |
| order number | ecommerce-data.metainfo.orderNumber | Ecommerce > Order > Order ID |
| order value | ecommerce-data.metainfo.value | Ecommerce > Order > Order Value |
| currency code | ecommerce-data.metainfo.currency | Ecommerce > Order > Currency |
| product status | ecommerce-data.metainfo.action | Mapp Intelligence product variable (see next chapter) |
| product array | ecommerce-data.products | Mapp Intelligence product variable (see next chapter) |
Depending on the structure, you can use the Mapp Intelligence product variable or custom javascript.
So while the user- and order information is pretty straightforward and nothing new compared to what we did in our basic implementation, the products are a bit more complicated. We expect the following structure for tracking products:
[
	{
		id: 'ABC-123',
		status: 'confirmation',
		cost: 99.90,
		quantity: 2,
		soldOut: false,
		variant: 'green',
		parameter: {
			1: 'L'
		},
		category: {
			1: 'tops'
		}
	},
	{
		id: 'DEF-567',
		status: 'confirmation',
		cost: 11.90,
		quantity: 1,
		soldOut: false,
		variant: 'blue',
		parameter: {
			1: 'S'
		},
		category: {
			1: 'underwear'
		}
	}
]So we have an array of objects with certain keys.
Of course, you can just write your products just like this in your data layer and then map the array to Ecommerce > Products > Product data.
However, chances are that you already have an array of products in your existing data layer and now you just need to make sure that the information of your data layer flows to the right place in the Smartpixel.
For that, we provide the Mapp Intelligence product array variable. Here you can remap existing properties in your array to the ones the Smartpixel expects.
In our example data layer above, we have a 'price'-property for example, but Mapp Intelligence needs a 'cost' property to measure product prices.
So after adding a new variable and selecting the Mapp Intelligence product array from the gallery as type, we remap price to cost very easily:
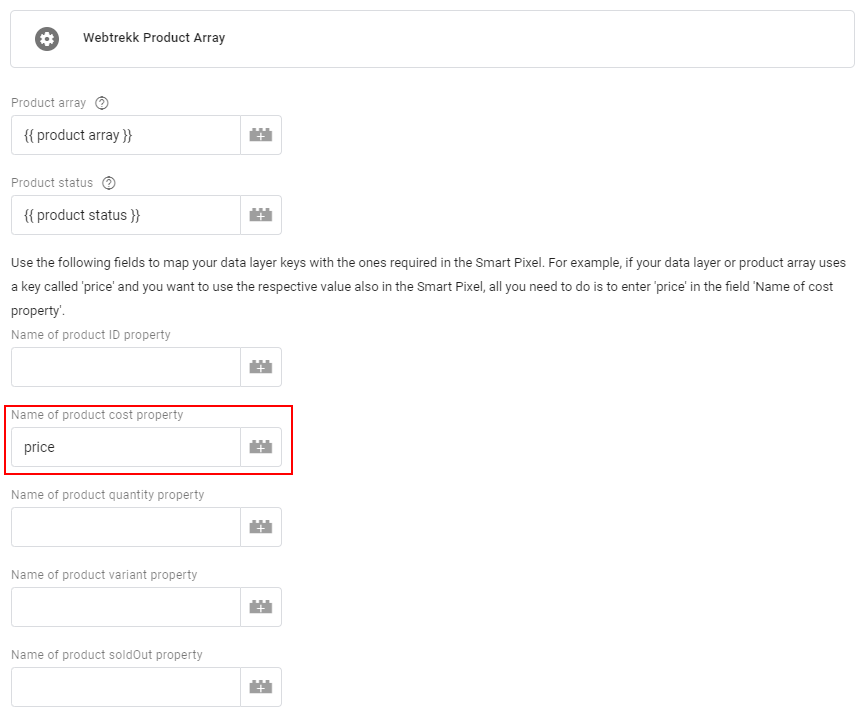
Since we have properties that are called 'variant', 'quantity', 'soldOut', and 'id', we don't need to enter anything in the corresponding fields.
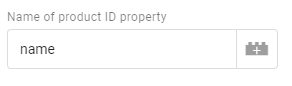
However, if we wanted to use our 'name' property instead of the 'id' property as a product ID in Mapp Intelligence, we can just add it like so:
We also have a 'category' property in our dataLayer. To map this value to custom product category 1, we can enter it like this in the configuration table:

Now we can map the Mapp Intelligence product array custom variable to Ecommerce > Products > Product Data without the need to change the property names of the existing data layer.
If your product information is not in an array-like in the examples above, but instead it is structured like this:
window.dataLayer = window.dataLayer || [];
window.dataLayer.push({
	event: "view-product",
	product: {
		soldOut: false,
		category: "Category A",
		variant: "Variant A",
		id: "1234567",
		name: "Product A",
		price: "11.95",
		quantity: "1"
	}
});Then you can hand it to Mapp Intelligence with a Custom JavaScript variable that computes your data in the format needed.
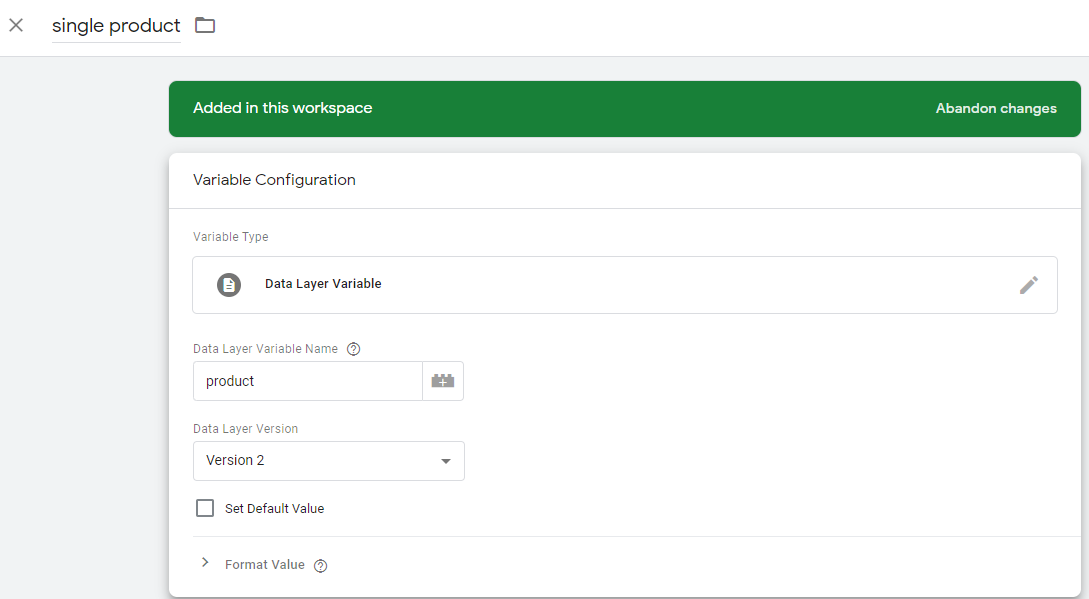
First, you create a data layer Variable, here we call it 'single product':
After that, you can reference it in a new custom JavaScript variable:
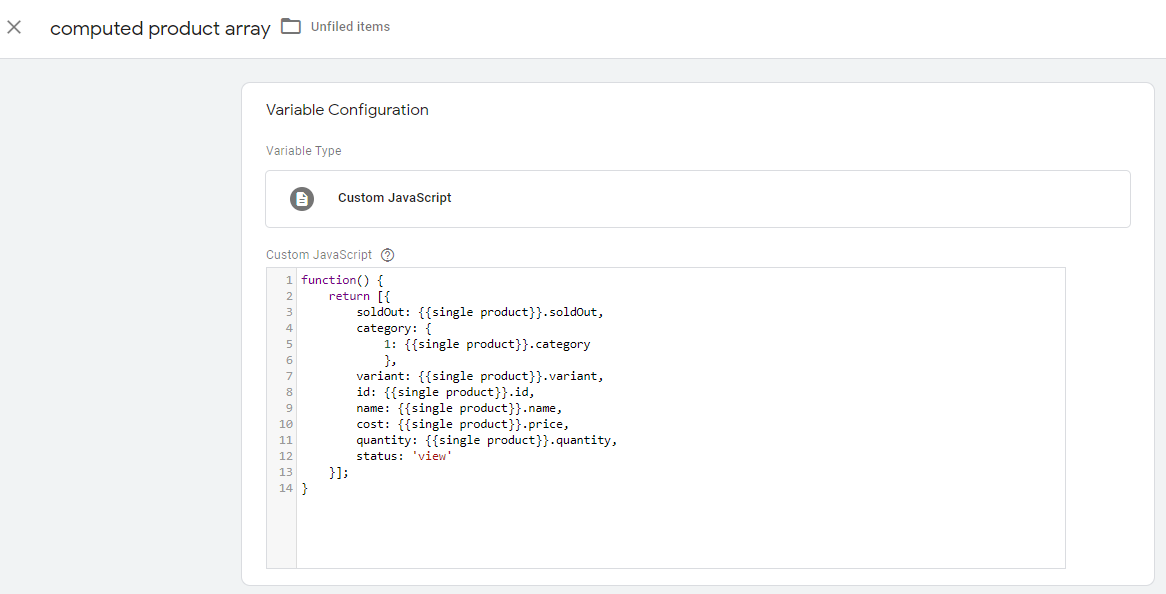
The variable we called 'computed product array' can now be mapped to products and will trigger a product view in tracking.