In this article, you will learn how to add localized buttons to your mobile push notifications.
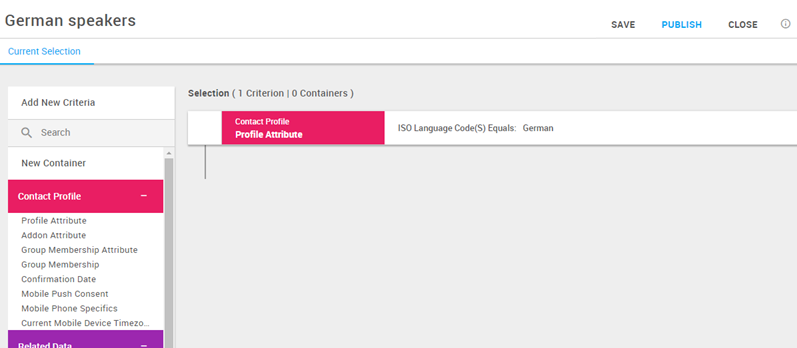
- With segments, we define which audience should get a message. In our case, we need them to specify the language of the people we want to contact.
In this example, we would like to contact German-speaking users.
A setup can look like this (Audience > Segmentation > Segmentation Builder):
- In the main menu select Administration > Channels.
- From Channels Management you can either edit an existing channel or select Create Channel for Apps.
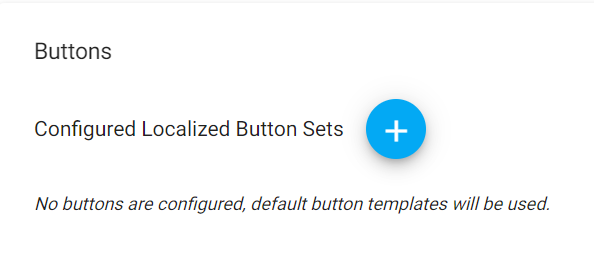
- After completing the Info page for the channel, you will be brought to the configuration screen. In the Button section, select the blue Icon. This opens the Localize Button Templates screen.
- Next, select the language you wish to use - in our example, German (DE) -, and add in your translations or localizations.
You need to add translations for all of the Templates. If you would like some of the buttons to stay in English, you may just repeat the given button label. When you have finished, click Save.
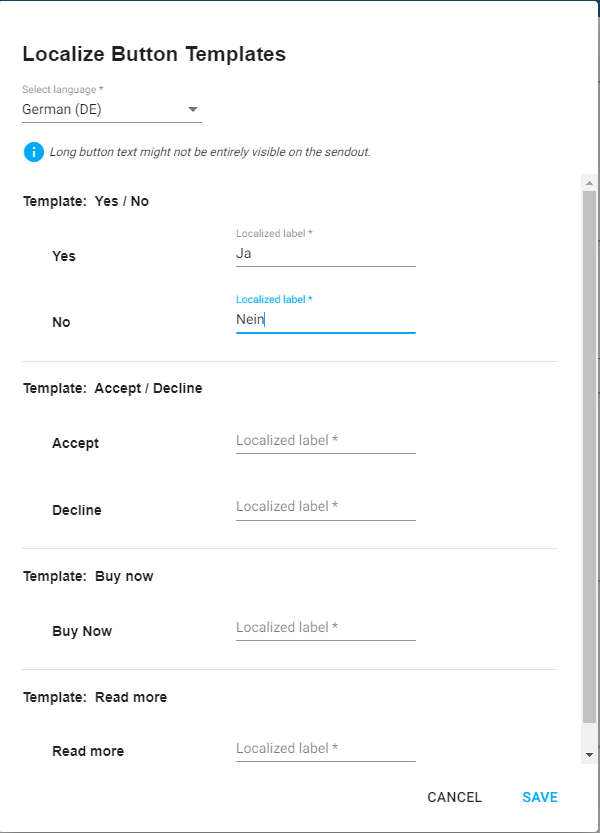
- If needed, you can repeat these steps for additional languages.
- Then, you can go to Push Messages and begin the creation process as you normally would.
- For App, select the Channel you have added your localized buttons to. Once you have reached the Button Actions step, you can select this localization. The drop-down Configure localized button set will appear. Select your desired localization.

- Then, make sure when selecting your audience, you pick German-speaking users as your Target Audience.
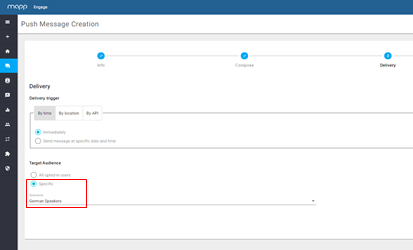
After this, continue as normal and your users will receive the correctly localized buttons!
Mobile Push Notifications
Channel Creation (Window)
Channels Management Overview