The Engage Contact Registration event is a pre-defined event that can be added into an on-site pixel from the Configure page.

  1. In the Tracking Pixels Overview window, select the pixel you want to configure and click Configure.
  2. From the Choose Event tab, select the Engage Contact Registration event.

    Give the event a name.
  3. Drag and drop the the Element Click condition onto the canvas and use Select Path to enter the CSS Path. See Select Tracking Elements Visually.
  4. Complete the Configuration settings. Add the details of the Engage group that the new contact will be added to and the details of the identifying attribute (Email or Mobile phone).
  5. Capture other User Attributes if required. 
    There may be other elements on the sign-up page that you want to capture for building an Audience, or for a different purpose. Click Add Custom Attribute to create an attribute in Acquire and populate it with data taken from web page. For example, if the new contact enters their Interest in the sign-up form, you can capture that Interest and build and audience based on this in the Segmentation Builder.

  6. Publish the pixel.
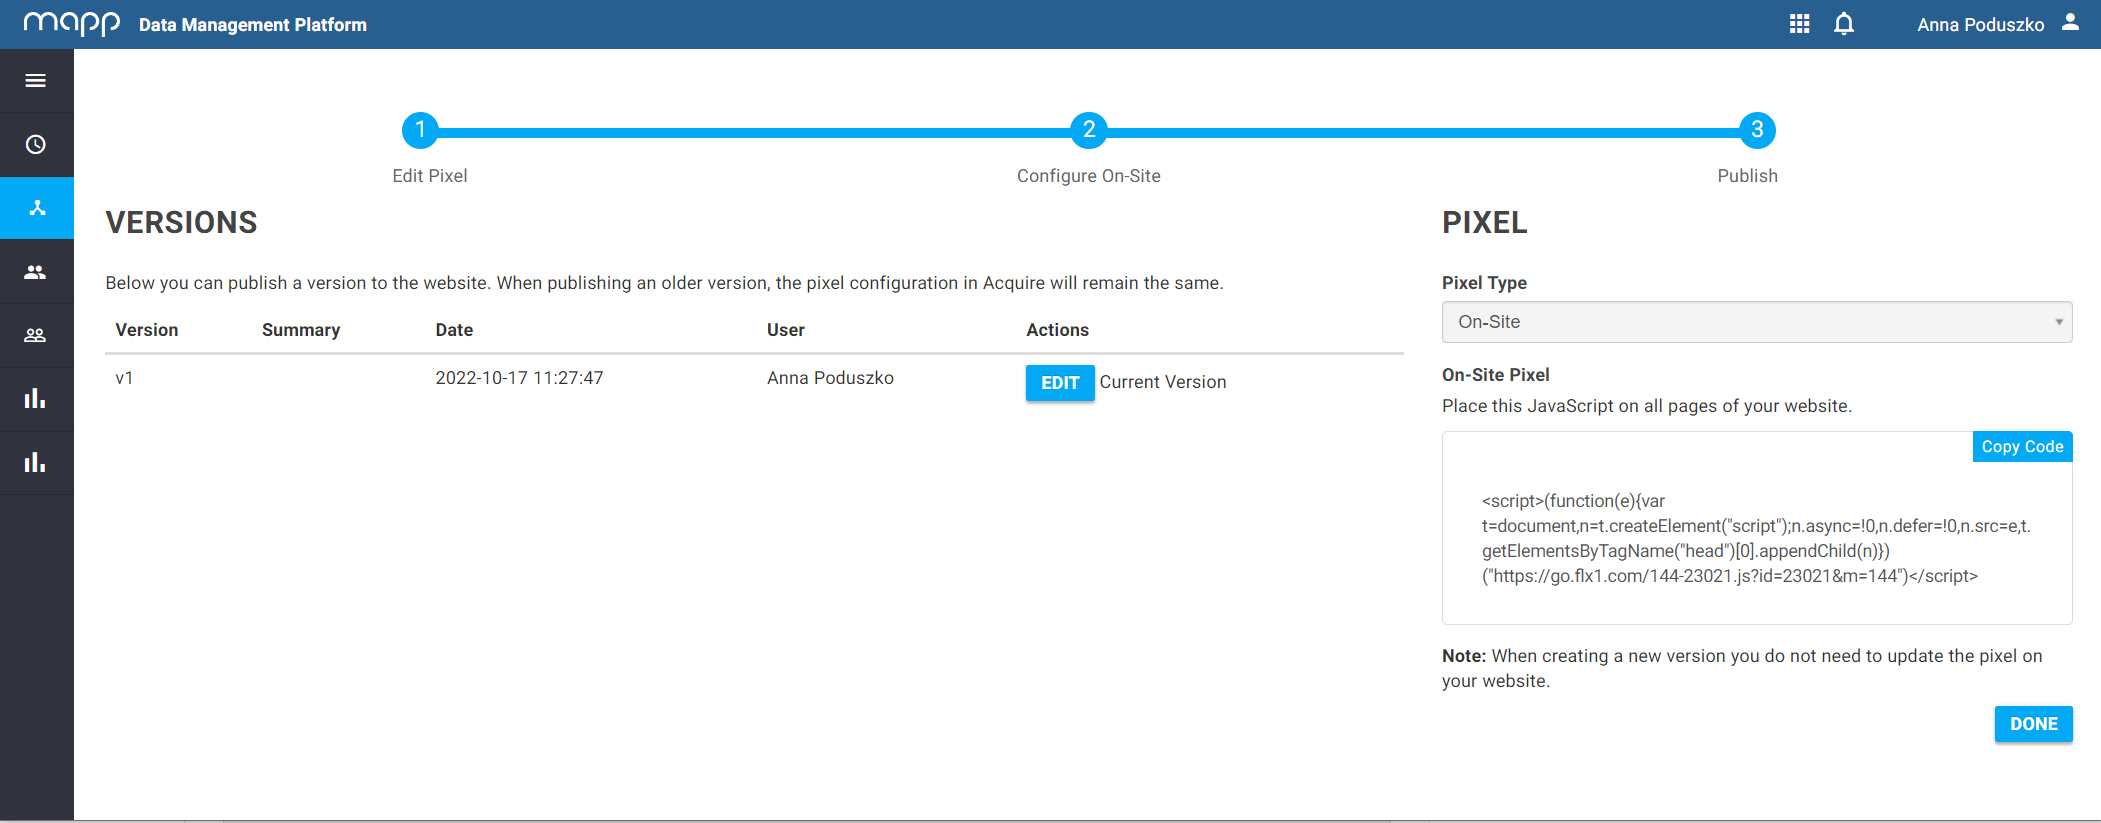
  7. Copy the pixel by clicking the Copy Code button. Place it in the <body></body> section of your HTML page.

    Example

    <html>
    	<head>
    	</head>
    	<body>
    		<script>(function(e){var t=document,n=t.createElement("script");n.async=!0,n.defer=!0,n.src=e,t.getElementsByTagName("head")[0].appendChild(n)})("https://go.flx1.com/144-23021.js?id=23021&m=144")</script>
    	</body>
    XML