Using product categories to measure performance
This article shows you how you can set up product categories.
Preface
Products can be grouped by using product categories. This allows a higher-level view, greater flexibility in the analysis, and easier usage of the user interface. By doing so, each product is uniquely assigned to a product category.
For example, a product category could be named "PC 1 - Main Category", a second one "PC 2 - Article Name".
Example for the assignment of products to product categories:
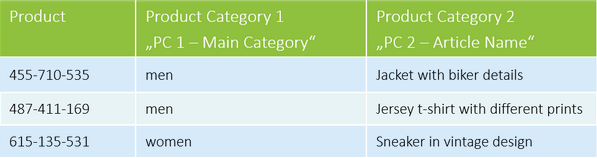
With this setup, it is easy to analyze how many product views, purchases, etc. were made for all men products (PC 1 - Main Category = men) and what the specific article name is.
Besides these text values, it is also possible to define figures. By doing so, for example, the purchase price of a product could be transmitted.
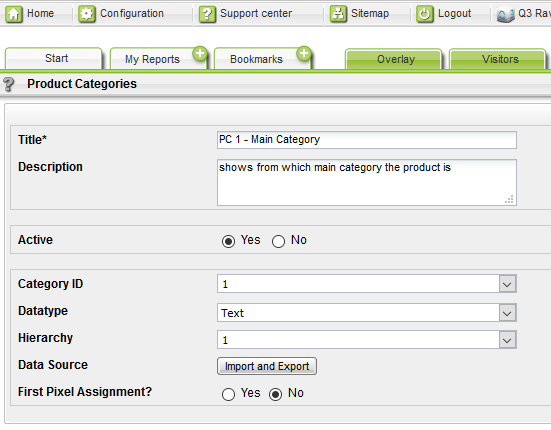
Step 1: Setting up a product category
You can set up product categories at Mapp Q3 > Configuration> Categories > Product Categories. You choose a title (e.g. "PC 1 - Main Category"), a description (will be shown as help content in the analysis), a Category ID (important for the data submission in the Mapp Intelligence pixel), the Datatype (Text or Figure) and the Hierarchy (necessary for the depiction in the Page Tree in Q3).
Step 2: Submitting data
Now data can be tracked for every product.
The data can either be submitted in the Mapp Intelligence pixel or imported.
Submission in the pixel
Use the category you stored in the configuration in the Mapp Intelligence pixel. In case you use it, don't forget to include the content groups into the NoScript section.
Important: If you submit the content groups via the pixel, data collection is only working for new pages, thus these pages, that have not been tracked by Mapp so far. Existing pages are depicted with "-". These pages can either be imported or the assignment can be reset. Please contact the Support when deciding for this option.
- Submission via import
You can import content groups via Excel, JSON, and Datafeed. By doing so, a retroactive assignment is possible. The following example shows the Excel import.
Click on the symbol on the right side in the tab Product Categories.
Choose Export > Export in the shown layer.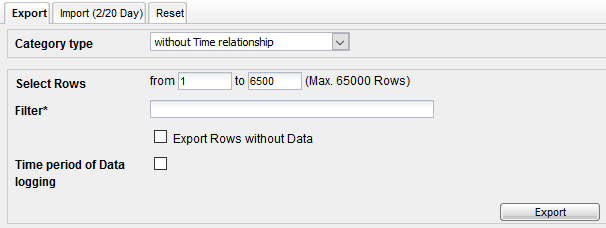
The data is exported into an Excel table. All products can be assigned to product categories in this table.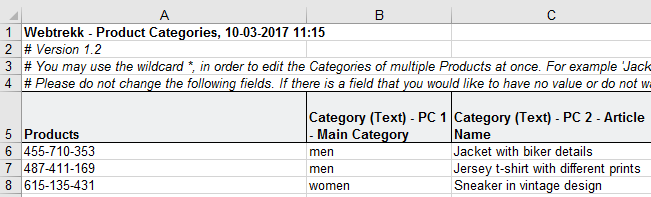
Now you can import the updated Excel table via Import.
Please note, that it usually takes about 1 hour until the import is processed.
If necessary, the product categories have to be unlocked for other logins in User Management.
Step 3: Analysis and usage
Depending on the chosen data type, product categories can be analyzed differently.
- DatatypeText
The analyses can be found at E-Commerce > Products > Product Categories.
Example:
Please note: All products, that don't have a value for the product category, are listed under "-". - Datatype Figure
The product category can be used as a metric.
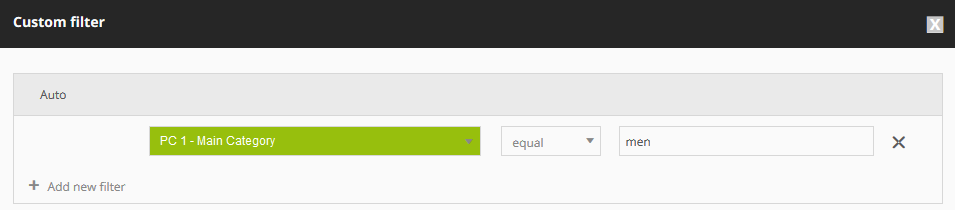
Often product categories are used as filters for analyses.